RubberBand-cvr-NEW

This project is an excerpt from Rubber Band Engineer by Lance Akiyama. This book is all about taking common household items and making awesome things out of them. You can buy the book here on May 15th.

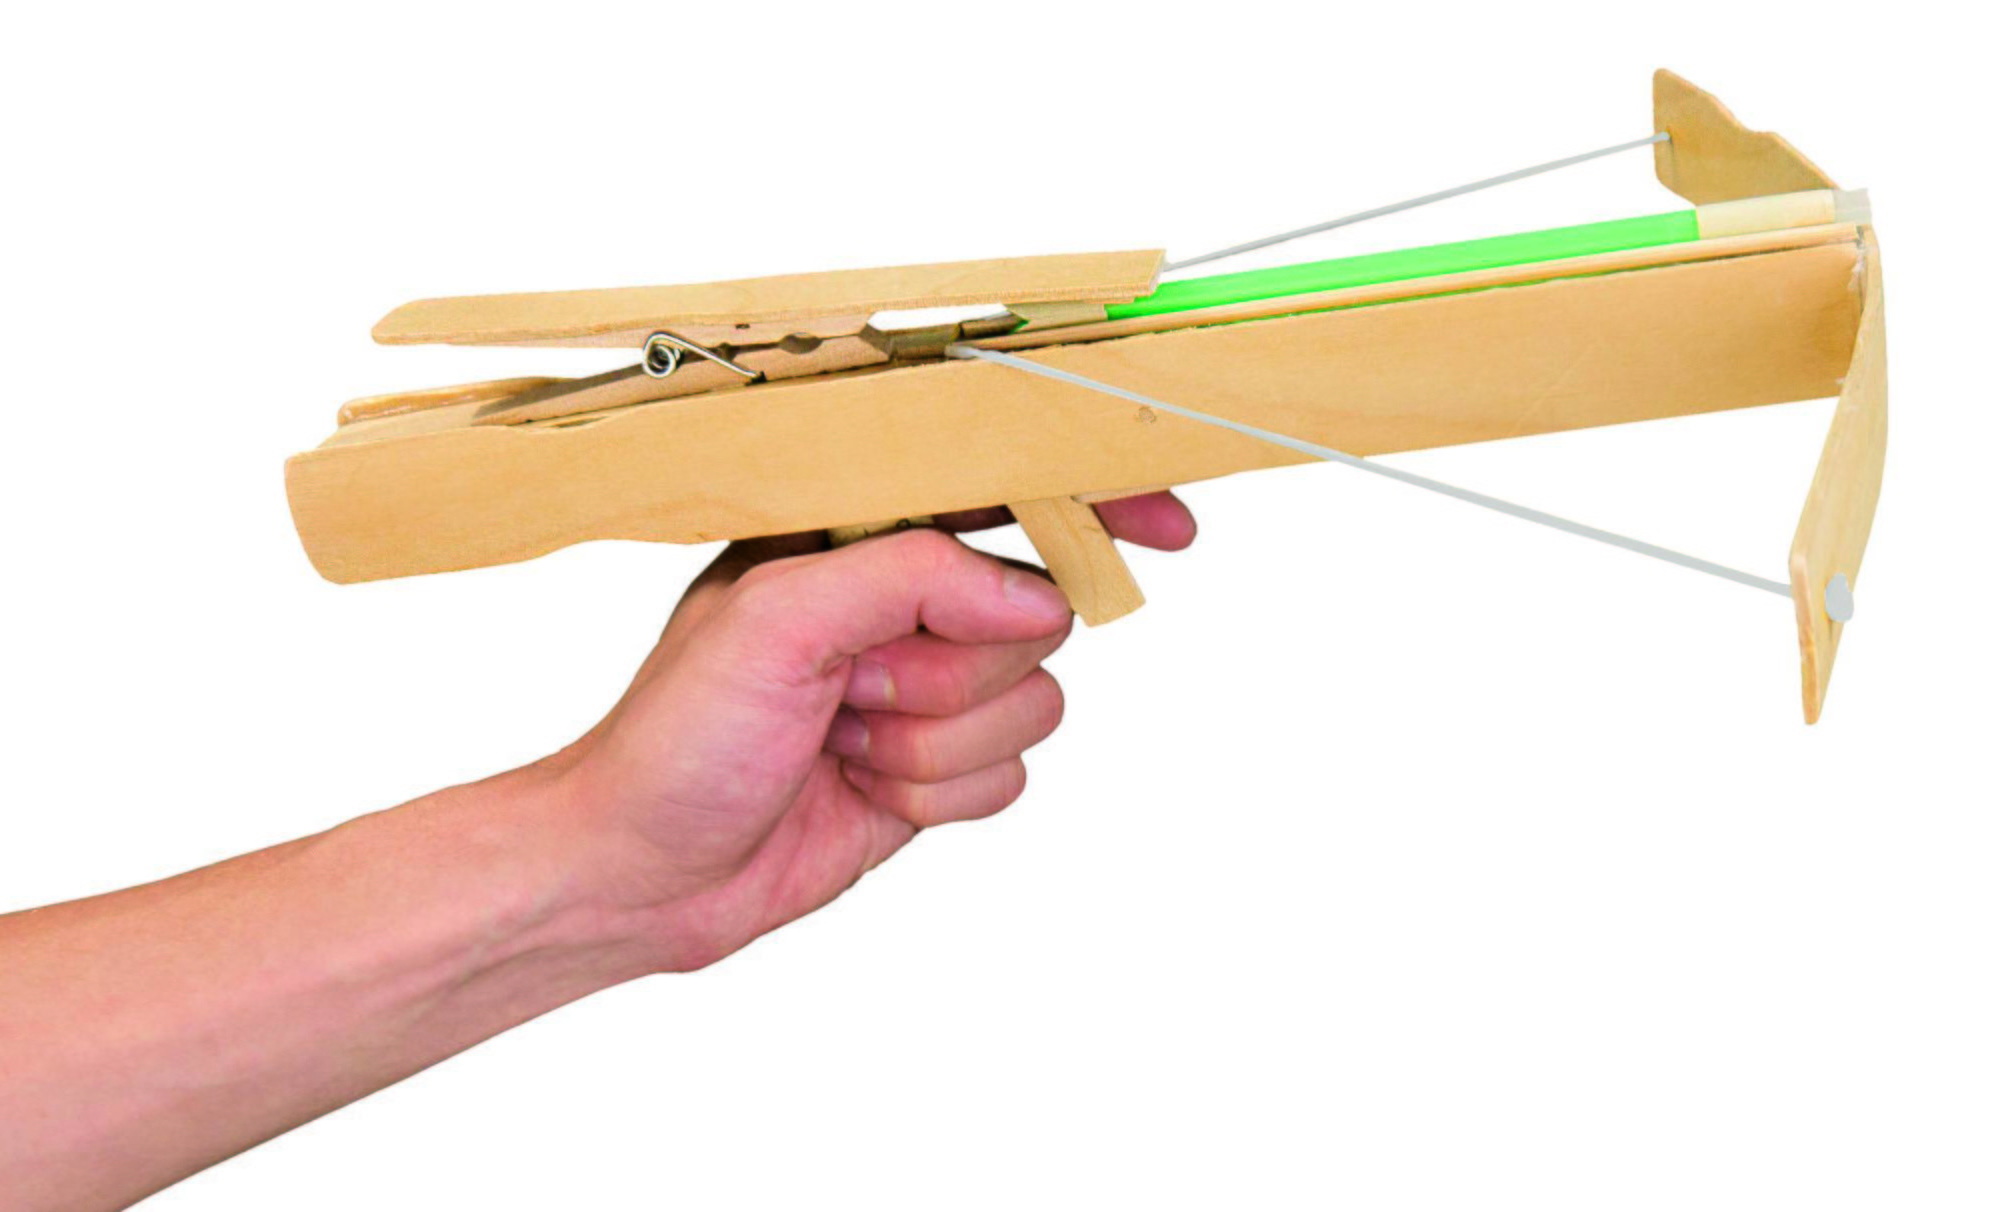
This project requires some determination to complete, but the payoff is worth it. The crossbow makes a satisfying snap when the trigger is pulled, and it can launch bolts more than 100′ (30m)! You can power this crossbow with a piece of string or with a rubber band.

Project Steps

1.

stirrers
Begin by preparing the paint stirrers as shown here. For the first, drill a ⅛” (3mm) hole near each end of the stick. For the second and third, drill a ⅛” (3 mm) hole 5¼” (13.5cm) from one end of each stick.

2.

For the fourth paint stirrer, using the ⅜” (1 cm) bit, drill a hole 4¾” (12cm) from one end. Lift the drill, move it toward the center of the stick, and drill a second hole ½” (1.3cm) from the first.

RP1044_064

3.

Using the utility knife, carve out the section between the two holes created in Step 2. Carefully cut along the grain of the wood, drawing the knife away from your body and hands.

RP1044_066

4.

For the fifth paint stirrer, use the utility knife to score and break the stirrer into two 4¾” (12cm) pieces and one 2″ (5cm) piece. Scoring the wood with the blade as described in Step 3, split the 2″ (5cm) piece in half length-wise. Trim a quarter inch off one of the 2″ (5cm) pieces and drill a ⅛” (3mm) hole near the end of it.

stirrer2

5.

Cut the sixth paint stirrer in half, crosswise. You’ll only need one of the halves.

At this point, your paint stirrers should be cut and drilled like so.

6.

Begin assembling the shaft of the crossbow like a box. Line up the paint stirrer from Step 3 with one of the stirrers from Step 1 with a hole 5¼” (13.5cm) from the end. Take careful note of the orientation of the holes on the photo.

RP1044_068

7.

Use hot glue to attach the edges of the paint stirrers at right angles. If the glue sets up too quickly when you run a thin line of it along the edge, use several beads of glue instead.

RP1044_069

8.

Glue the second stirrer with a hole 5¼” (13.5cm) from the end opposite the first. Make sure that the two ⅛” (3cm) holes line up.

RP1044_070

9.

Turn the box over and glue the two 4¾” (12cm) stirrer pieces to the underside of the shaft. The 2″ (5cm) gap in the center will be where the trigger goes.

Tip: Use additional hot glue to fill in the gaps between the beads of glue.

RP1044_071

10.

Make a trigger with the two small pieces of wood from Step 4. Position the piece with the ⅛” (3mm) hole at a right angle to the other, ½” (1.3cm) down from the top. Hot glue the two pieces together.

RP1044_072

11.

Set the trigger into place. Choose the thickest skewer and thread it through the holes in the crossbow shaft and trigger. This design relies on the friction between the skewer and the ⅛” (3mm) holes to hold it in place. The ½” (1.3cm) of the trigger’s crosspiece should poke through the carved hole.RP1044_073

12.

This is how the trigger should look, and it should swing up and down. If it doesn’t quite fit, then you may need to drill or carve out a larger hole, or drill new holes for the trigger hinge. When you have it working, trim off the extra lengths of skewer and save the scraps.

RP1044_074

13.

Create the guides for the bolt. Cut the skewer scrap and the second skewer to 6¾” (17cm) lengths. Glue the two skewer pieces parallel to each other with about ⅜” (1cm) between them. The ends of the skewers should line up with the front of the crossbow shaft and the middle of the trigger head.

RP1044_075

14.

Center and glue the paint stirrer with the ⅛” (3mm) holes drilled at either end to the front end of the crossbow shaft.

RP1044_076

15.

Thread the string through the ⅛” (3mm) holes and knot the ends. To make the knot tying easier, an 18″ (45.5cm) length of string is recommended, but ultimately the string should be 12″ (30.5cm) long from one hole to the other. The bow should start to bend as you pull the string back a few inches.

RP1044_078

16.

Give the string a test by pulling it back and slipping it over the ends of the skewers. (If this is difficult to do with your fingers, use the pencil’s eraser to push the string into place.)

You may need to calibrate the tension of the string to achieve the most force. The string should be a little loose when under no tension, but very taut when loaded. If you are unable to load the string at all, then it needs to be a little longer. Trim the ends of the string with scissors when complete.

RP1044_092

MATERIAL SUBSTITUTION

Here is a crossbow outfitted with a rubber band, which may be the way you’d like to go. Getting just the right string length is a trial and error process. Rubber bands are easier to load and easier to calibrate to achieve the right amount of energy, but may not provide as much force as a taut string.

17.

Glue the clothespin directly behind the carved hole. This will be used to hold bolts in place.

RP1044_080

18.

Glue the half-piece of paint stirrer from Step 5 onto the top of the clothes-pin. The lower end of the stirrer should be between ¼” and ⅜” (6mm and 1cm) from the top of the shaft. The crossbow is complete!

Tip: You can use the clothespin as a simplified trigger for the rubber band-based design.

19.

Test the trigger. Pulling on the trig-ger should push the string off the ends of the skewers. If the string gets caught on one skewer, double check to make sure that the trigger is centered exactly between the skewers. Also check to make sure that the ends of the skewers are about the same diameter and flat.

CREATE CROSSBOW BOLTS

Now it’s time to create the crossbow bolts. There are many options for creating ammunition: pens, pencils, dowels, and even hard candy will work. These bolts, made from drinking straws, are designed for distance.

20.

RP1044_082

Cut a thick drinking straw to 6″ (15cm) in length. Insert something dense in the tip, like a 2″ (5cm) piece of a hot glue stick. This piece of glue is called a leading weight. Tape the glue stick in place and wrap tape around the other end of the straw.

21.

RP1044_086

Cut a nock into the back of the straw by pinching the tip until it’s flat, then cutting off the corners. A nock will help to ensure that the bolt fires consistently.

22.

RP1044_090

Get ready to fire! Load the string behind the skewers on the crossbow. Place your bolt directly in front of the trigger hole, but don’t cover it. Close the bolt holder on top of the bolt to keep it in place while you prepare your shot.

DESIGN VARIABLES

This is just one example of a crossbow, but you can scale the proportions of the crossbow frame to be larger or smaller. Do a quick Internet search for “crossbow trigger diagram” to find more complex ways of releasing the string. Add a thumbtack to the tip of your bolt and set up some cardboard targets. Create a compartment for holding your ammunition.