


 You know Adam Savage as the co-host of the terrific MythBusters television show, but did you also know that Adam has a career as an effects designer and model maker for the movie industry? His sci-fi creations can be seen in movies such as movies Galaxy Quest, Bicentennial Man, Star Wars: Episode II – Attack of the Clones, The Matrix Reloaded and Space Cowboys, and others.
In MAKE Volume 24, Adam shares his model making skills in the form of an article titled “Hard Shell Molds.” In the piece, he takes you step-by-step through the process of making a hard shell, or “mother mold,” that can be used to make resin casts of large props (such as a futuristic ray gun). The process is quite detailed, finicky, and time-consuming, but Adam’s directions are clear and thorough. I found the photos of the mold itself to be quite beautiful — a true work of art, even though its purpose is strictly utilitarian.
Back in MAKE Volume 08 Adam wrote a primer on how to make molds for casting small objects. It’s a simpler process than making a hard shell mold, and a great place to get started if you want to learn about silicone mold making. You can read an intro to the article here. Unfortunately, MAKE Volume 08 is sold out, but if you subscribe to MAKE, you’ll get full access to all 24 issues in digital format.
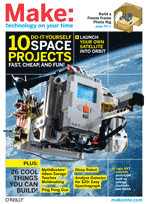
Check out MAKE Volume 24:
 MAKE blasts into orbit and beyond with our DIY SPACE issue. Put your own satellite in orbit, launch a stratosphere balloon probe, and analyze galaxies for $20 with an easy spectrograph! We talk to the rocket mavericks reinventing the space industry, and renegade NASA hackers making smartphone robots and Lego satellites. This, plus a full payload of other cool DIY projects, from a helium-balloon camera that’s better than Google Earth, to an electromagnetic levitator that shoots aluminum rings, and much more. MAKE Volume 24, on sale now.
4 thoughts on “Adam Savage’s mold-making in MAKE Volume 24”
Comments are closed.
ADVERTISEMENT
Join Make: Community Today


Just subscribed so I can read the full article. Unfortunately *SCAM ALERT* this article says that if you subscribe you can read back issues. NOT TRUE – do NOT subscribe!!! You also have NO options to subscribing to back issues, you do NOT get to see back issues… just another way to get your dollar then leave you dry.
I’m sorry you are having trouble accessing the complete digital archives that all subscribers have access to. Could you please email me (mark@makezine.com) and we will get this resolved.
Mark Frauenfelder
editor-in-chief of MAKE