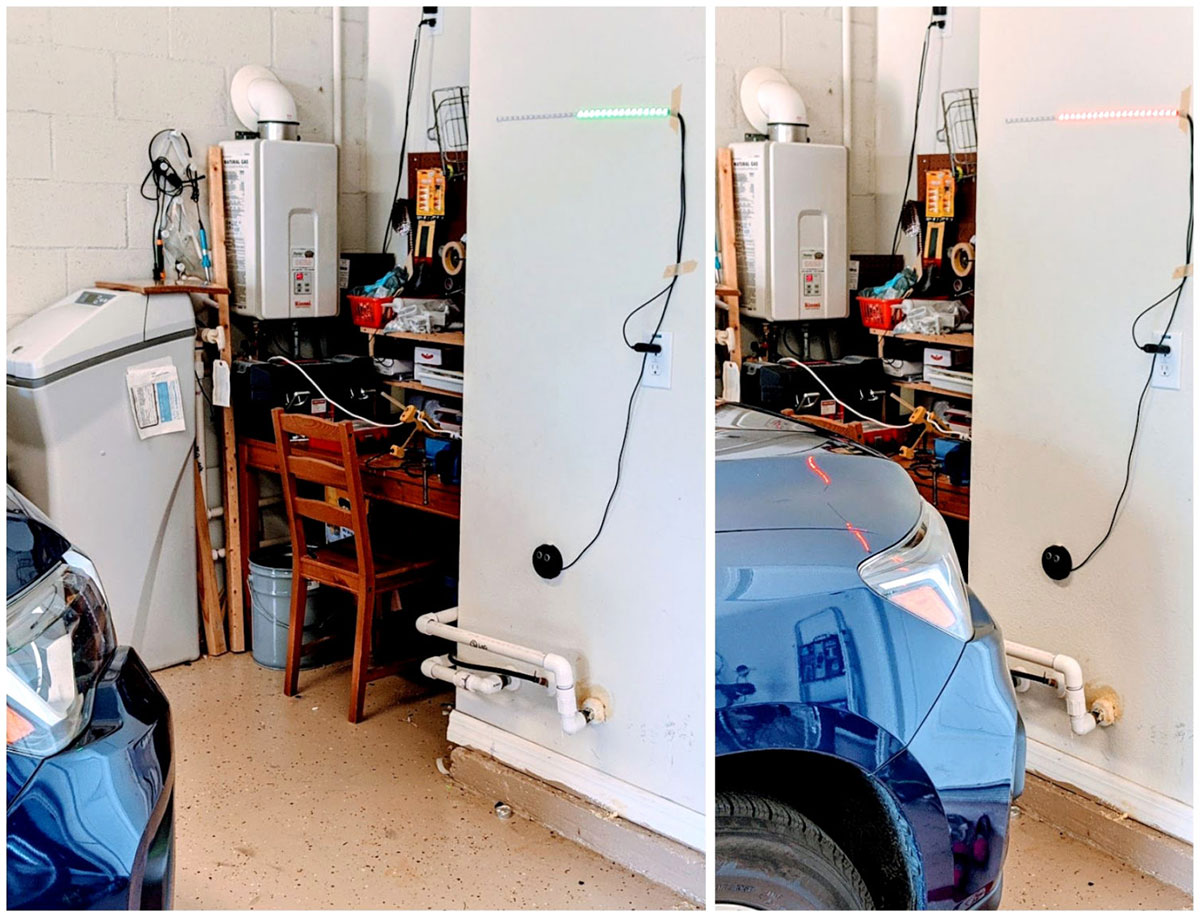
We live in a house with a very tight garage, and our relatively big car leaves a tiny space in front. I designed and built this simple project to visually guide the driver into the optimal parking distance, using real-time feedback about how close the car is to the wall in front. In short, it tells you when to stop.

this project is from the pages of Make: Magazine. Get your subscription today!

The project uses an ultrasonic sensor and Arduino to measure distance and then displays it on a full-color LED strip as a progress bar. The sensor is mounted on the wall; as the distance between the car and wall shrinks, the light strip shows an increasing number of illuminated LEDs, which also change color from green to amber to red, and then finally, flashing red.

This quick build will help anyone safely pull their car into the garage without worrying about hitting the wall or damaging the car. It is easy to assemble, and it’s a fun project for learning how how to work with LED strips and how to use ultrasonic sensors to measure distances.

Written and photographed by Krish Gupta

Project Steps

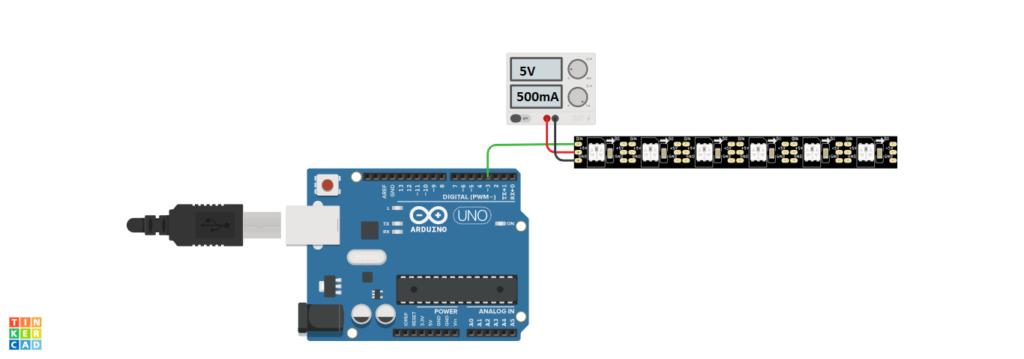
CONNECT THE LED STRIP

The green wire from the LED strip is the Data wire, red is Power, and white is Ground. Connect the white wire to the ground of your power source, and the red wire to 5V of the power source. Connect the green wire to Digital 3 on the Arduino. I used a 1 meter, 60 count LED strip and cut that in half to make two separate garage sensors. You can use whatever number of LEDs works for your garage, just make sure you change the NUM_LEDS value in the Arduino code to whatever number you have.

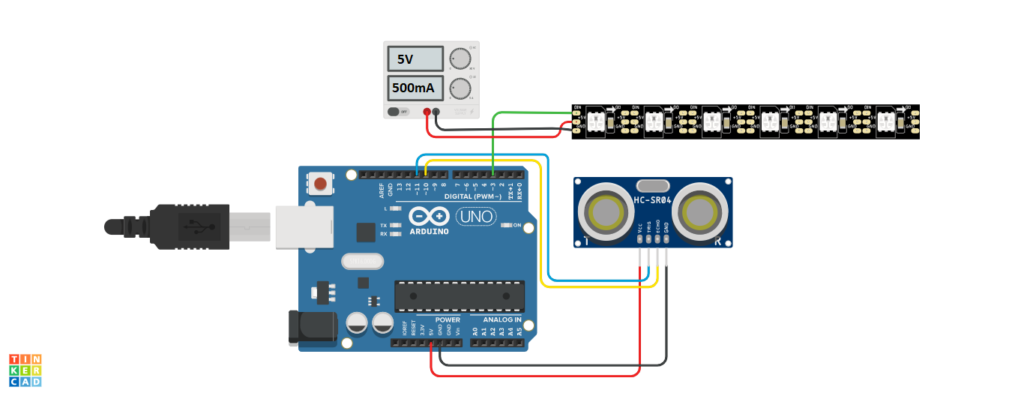
CONNECT THE ULTRASONIC SENSOR

Place the ultrasonic distance sensor on the breadboard. Then connect it to the Arduino: sensor pin Trig to Arduino pin Digital 10, Echo to Digital 11, GND to GND, and Vcc to 5V.

PROGRAM THE ARDUINO

Download the project code and upload it to your Arduino. That’s it.

CRASH NO MORE

Now that you have your finished product you can use it in your garage!

Mount the ultrasonic sensor and LED strip on the wall and start bringing your car into the garage. Watch the colors change, and when the red lights flash, stop! The default stop distance is 30cm (about 1ft) but you can change that in the ZONE and MAXRR variables in the code.

If you want to mount this without the breadboard, you can use an Arduino Nano and put that inside a 3D printed case (the template I made is available in the code downloads folder, or you can modify it from TinkerCad) but I just used a plastic jar lid I had lying around.

I’m also working on an advanced version of the code that lets you add a momentary pushbutton switch to go into a calibration mode where you can read and calibrate parking distances from the sensor itself and not have to hardcode it. You can find the code for this on the download link as well.