Patrick is the founder of DevDiner.com, a site helping developers navigate the world of emerging tech. He also is a SitePoint editor focused on exploring the possibilities of new technology such as the Internet of Things, virtual/augmented reality and wearables. Alongside those roles, he is an instructor at SitePoint Premium and O'Reilly, a Meta Pioneer and a freelance web developer who loves every opportunity to tinker with something new in a tech demo.
The Maker community is an extraordinary bunch filled with wild ideas and potential, limited only by the capabilities of the components they can get their hands on — but what if I told you there were worlds you could have complete control over? They’re out there, and over the next few years we’ll see their populations and influences explode. And I’m not talking about Mars. Welcome to the virtual worlds.
You’ll soon be able to roam these virtual worlds in an incredibly immersive way thanks to advancements in virtual reality. But — and this is where I think things get interesting for Makers — you’re not going to be limited to exploring these environments. You can actually build entire worlds from scratch. Nor are you limited to the virtual; you can build a physical controller, sensor, wind/heat generator, or wearable that responds to the virtual world and pair it with the right code to make it feel all the more real.
So we’re launching a new series here at Make: all about DIY virtual reality. First, I’ll be covering the basics of how you can build these worlds in Unity and bring them to life in VR. We’ll get started by going over the basics of Unity from the perspective of people who are used to building physical things.
What is Unity?
Unity is a game development platform that can create both 2D and 3D games. It can also be used for general 3D experiences that are not games, and it’s cross platform, so it can be used to develop apps for PC, Mac OS X, consoles, iOS, Android, Windows Phone 8, the web, and more. With the emergence of VR/AR, it can also be used to develop for the Oculus, Gear VR, Playstation VR, Meta Glasses, and the Microsoft Hololens. Your creations can reach a wide range of users when built with Unity.
Unity comes with two versions, the Personal Edition and the Professional Edition. (Check the license agreement to see which your organization qualifies for.) The Personal Edition is free, though it places a splash screen onto your creation each time you open it. The Professional Edition allows you to change this splash screen, provides access to analytics, and lets you access some plugins which require the Professional Edition to work.
To download either edition, head over to the Get Unity page. There’s a demo there you can try out.
When you start a Unity project, it creates the folder and files automatically. Therefore, when you create a new project, choose the folder that you would like to be a parent of the Unity folder rather than creating one specifically, lest you double up.
Every Unity Project comprises a folder with four initial folders inside it. You only need to worry about two of these (the contents of the other two are automatically generated from these two when Unity opens the project):
Assets — All of the resources for your Unity project will be in here. This includes the 3D models, textures, scripts, sounds, and so on. Basically, this is the one folder you’ll put files in.
Within your “Assets” folder, you’ll want to create the following folders to keep things neat and tidy. This helps separate your assets by type:
Materials
Meshes
Plugins
Prefabs
Scenes
Scripts
Textures
ProjectSettings — This is where Unity saves all project settings that you set up within the Edit > Project Settings menu in Unity.
We won’t go into detail about the whole interface, but here is a diagram with a few of the main areas pointed out:
The Scene — This is where your objects will be placed within your virtual world. Just like a scene in a play, you can have multiple scenes in a Unity project, each one completely different but able to share elements from the previous ones. Scene Gizmo — Rotate and view the scene from different angles and perspectives (only visible in 3D projects because you can’t really change the view of a 2D scene). Your Object Hierarchy — This is where all the objects that have been placed into the scene will appear. Your Asset Folder — You can see your asset folder at the bottom and use this to drag elements from this folder into your scenes. This is like your box of gadgets, filled with objects and components just waiting to be used. The Game View — There is a tab which will show the Unity project as it is running. To run a project, use the control at the top of the window (recognizable by its play and pause buttons).
Within Unity, every single object you put into your scenes is called a GameObject. GameObjects are the items which we can see and/or interact with. They are the building blocks that create our virtual scene. They can be shapes like cubes, spheres, capsules, cylinders, and planes. They can also be lights and sounds, as well as (most important of all) cameras, which act as the user’s view of the world when the Unity project is running.
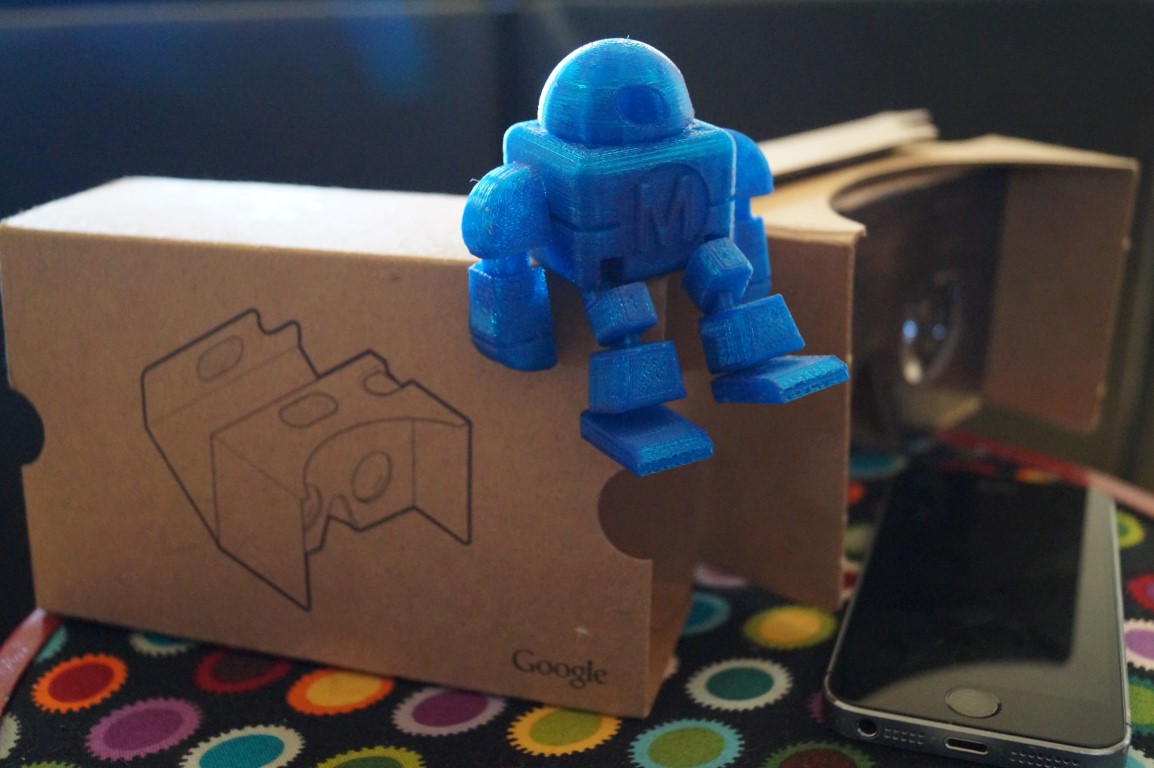
We can also have empty GameObjects that work as containers for grouping the visible GameObjects together. You could create an empty GameObject to represent a robot, adding individual pieces like arms, legs, torso, head, etc. as GameObjects within it.
You can also group them further (e.g., grouping multiple segments of a robot’s arm) depending on what you are looking to do with the object. You’ll find a whole menu in Unity devoted to GameObjects. Select a bunch of them to experiment with in your scene to see what they look like:
As an example, choose a cylinder. If you take a look at the cylinder which appears in your scene, you will find three arrows — red, green, and blue. Dragging the red one will move the object along the X axis (horizontally), the green one moves the object along the Y axis (vertically), and the blue one moves it along the Z axis (closer or further away).
You can also change these in the inspector (as well as rotate and scale it), which you should find on the right hand side of your Unity window:
Components give the GameObjects the ability of physical things, like hinges for joints, audio sources, visual effects, and custom scripts which can do almost anything you imagine. Often, components are where the magic really happens. They allow you to empower the GameObjects like you would real world objects like Nerf guns, furniture, clothing, and more, functional parts, including crazy ideas and unusual actions.
Also within the Inspector (the same spot where you could change the GameObject’s position, rotation, and scale) there is an “Add Component” button on the bottom right of your interface:
PREFABS
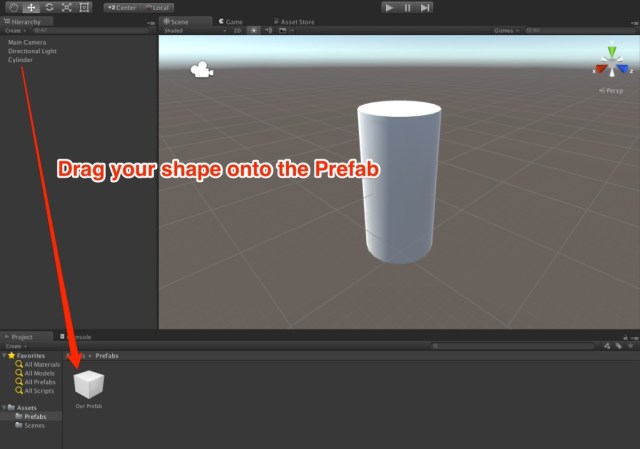
Often, you make something which you want to reproduce and reuse many times. Copy pasting the same object over and over again works, but what if you want to change something later on that applies to them all? This is where Prefabs come into play. Prefabs are an asset type in Unity that is like a template for a type of GameObject you’ve created. As an example, imagine you’ve got a virtual robot that has specific functionality you’d like to replicate. However, you don’t want them all to look exactly the same. You’d like to give different colors to each, and maybe give them a different ability or something along those lines. You’d use a Prefab for the virtual robot’s general shape and functionality.
To create a Prefab, go to Assets > Create > Prefab. We can name the Prefab whatever we’d like. I’d also recommend putting it into a folder called “Prefabs”.
Then, drag the GameObject that we would like to be the basis for the Prefab onto the new blank Prefab:
It should visually change to show it is now a cylinder. If we click this, the Prefab’s settings will appear in the Inspector. If we change these settings, they will change all instances of this Prefab in your scene:
You can then drag this Prefab into the scene like any other GameObject. Changing the settings when we click the GameObject in the scene will only change this instance’s settings in particular. Those changes that are different from the Prefab will have their labels in bold. I’ve dragged one of my Cylinder Prefabs into the scene and changed a few sample settings here:
The scene also began with a “Main Camera”. This is what the user will see the scene through when the Unity project is run. You can move it around to change what is visible. You can also set up controls for it so that the user can look around the scene. For now, to keep things simple, leave the camera as is.
Simple cylinders, cubes, and spheres are wonderful but you likely have grander schemes in mind. Importing custom meshes will let you realize unique shapes. The easiest formats to import in for Unity are .fbx, .3ds, .dxf, and .obj files. Unity can also convert some other formats, but it requires the licensed copies of the associated software for it to be able to import them.
To import in a custom mesh, get an object file (I’ve used a .obj), create a new folder in your Assets folder called “Meshes”, and drag it into this folder in Unity:
Then drag it into your scene to use it. With some imports, you may need to adjust their rotation and scale to make it a reasonable size and orientation. For my custom object, I needed to scale it to 10% of its size, so I entered in 0.1 to X, Y, and Z to the scale transform property. I also needed to rotate it:
When you have a scene ready to try out, test it out by clicking the Play button.
While this covers the absolute basics for getting started in Unity, and should be enough to get you tinkering away, it is just the start of what is possible. In the next part of this series, we will look at bringing in the Google Cardboard SDK, so we can start to view the scene in virtual reality.
Patrick is the founder of DevDiner.com, a site helping developers navigate the world of emerging tech. He also is a SitePoint editor focused on exploring the possibilities of new technology such as the Internet of Things, virtual/augmented reality and wearables. Alongside those roles, he is an instructor at SitePoint Premium and O'Reilly, a Meta Pioneer and a freelance web developer who loves every opportunity to tinker with something new in a tech demo.
When you buy through links on our site, we may earn an affiliate commission.
Our websites use cookies to improve your browsing experience. Some of these are essential for the basic functionalities of our websites. In addition, we use third-party cookies to help us analyze and understand usage. These will be stored in your browser only with your consent and you have the option to opt-out. Your choice here will be recorded for all Make.co Websites.
Allow Non-Necessary Cookies
Escape to an island of imagination + innovation as Maker Faire Bay Area returns for its 15th iteration!
Buy Tickets today! SAVE 15% and lock-in your preferred date(s).