


Make Your Own Miniatures
There is a huge market for miniatures for Warhammer and other games. Even for table top and role playing games that are not strictly miniature-based, players often use minis to enhance game play. Some people love to paint minis and build their own action scenes.
Whatever your desire or interest, if you’ve ever wanted to create your own mini, you can do so pretty easily with a 3D printer and some modeling tools. This skill builder will show you how to take existing 3D models, combine and add them to a base and scale it to the size you want for your purposes.
In this skill builder, you will learn how to create a simple beveled mini base in OpenSCAD. Then you’ll import that base and two other 3D models in Meshmixer and combine them all into a printable miniature. I’ll explain the basics of the tools, show examples, and provide links for the resulting 3D models. You can start from my example .scad and .mix files and tweak them for your needs, and then export .stl files for printing.
I’m a big Doctor Who fan, so I chose a character from that universe for this example miniature. You can create your own models if you are so skilled (I’m not), or do what I did and find someone else’s models to work with on Thingiverse or another repository. At the end of the post I also provide links to some of my other miniatures.
Design Your Mini
Selecting Models for the Mini
If you don’t have a 3D model of a figure you want to turn into a mini, try searching for one. Thingiverse and other sites have many examples, often free for reuse under Creative Commons or other licenses. Do be nice and credit the creator if you post a design using their model. Like this:

I wanted a figure of a Sontaran warrior without his helmet on, but I couldn’t find one. So I picked two models from Thingiverse user cerberus333, the Sontaran Bust [Dr Who] model and the Sontaran clone model. We are going to use Meshmixer to combine these two models together.
I also picked these for their printability without support. Although an Orc Chief with arms raised high would make an awesome war gaming mini, I didn’t want to complicate this post by choosing something you’d have to print with support.
Determine the Scale
How big do you want your mini? You’ll find scale referred to either as a ratio (e.g., 1:48 or 1/48) or as a height (e.g. 25 mm). Many war gaming minis are on the so called 25 mm scale. I say “so called” because interpretation of this is a hot topic among some hobbyists. Try searching for ‘warhammer scale’, and you’ll see what I mean.
For this example, I tried to go for a 1:35 scale. I felt this was big enough to show some detail, but small enough to still call a mini. You can adjust these instructions based on the scale you want.
Based on what I could tell from pictures from Doctor Who episodes, I decided Sontarans are about 5 ½ feet tall. Let’s translate that to mm:
5.5 ft × 12 in/ft = 66 in (full scale)
66 in × 25.4 mm/in = 1676.4 mm (full scale)
1676.4 mm / 35 = about 48 mm (1:35 scale)
So I want my final model to be about 48 mm from the sole of his feet to the top of his head. The base will add 2 mm.
Create the Base in OpenSCAD
OpenSCAD is a free 3D Computer Aided Design (CAD) modeling tool, that lets you program your model, rather than draw it.
Download the latest version of OpenSCAD for your preferred computer operating system, and install it. These instructions were written using version 2015.03-1 for Windows
Create a Beveled Cylinder
Fire up OpenSCAD and create a new file. Save your file with a unique filename so you can find it later.
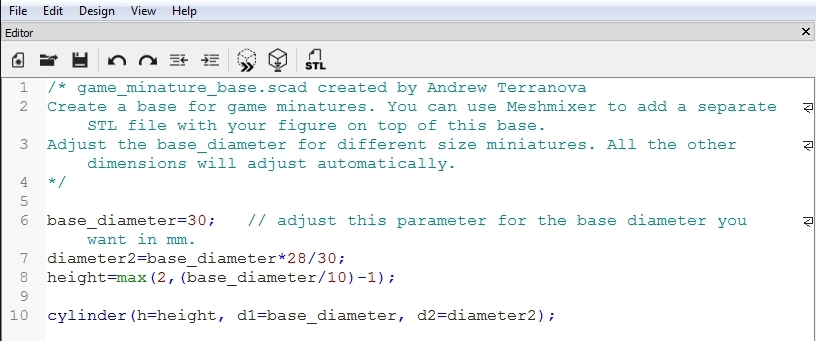
Comments in OpenSCAD start with a double-slash (//). You can also define a block of comments by opening with a slash-asterisk (/*) and closing with asterisk-slash (*/), as you can see below.
Making a beveled base is dead easy in OpenSCAD, because you can define a cylinder with two different diameters. The base_diameter (d1) is at the bottom and diameter2 (d2) is at the top. I designed a 30 mm base, but you can adjust the parameters for the size mini you want. A 30 mm base works pretty well for a standing human-sized figure at 1:35 scale.
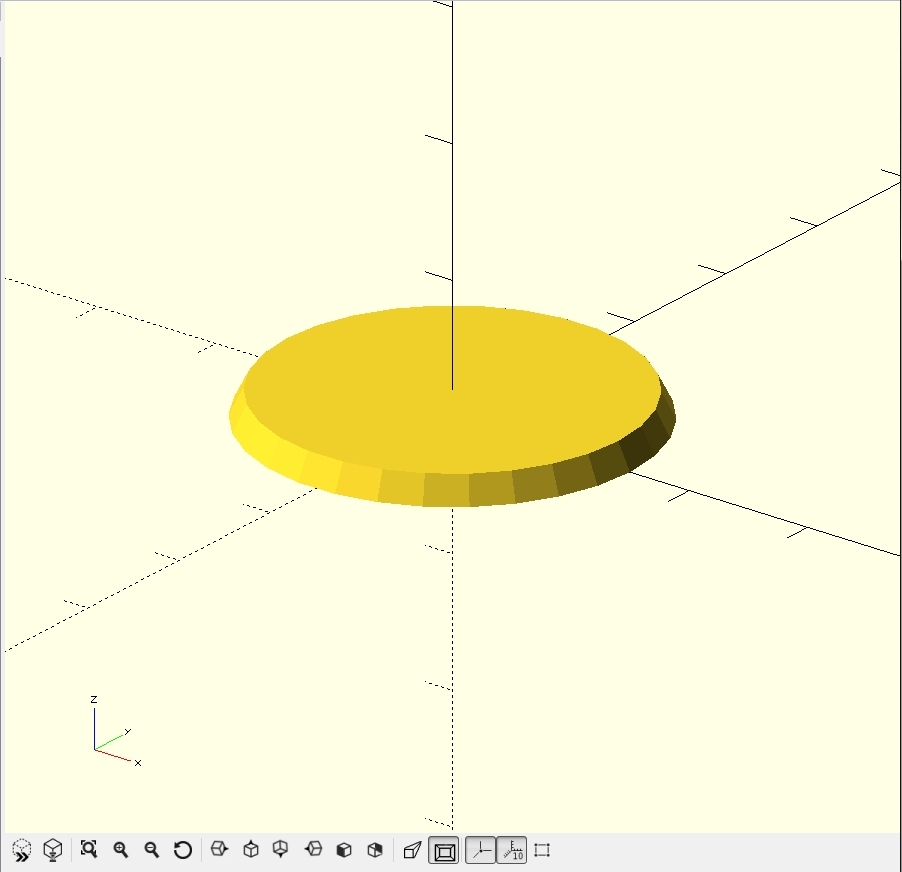
Press the Preview button on the toolbar, and you will see the resulting cylinder in the model display area of the screen.
Render and Export the Base
Once you are happy with your model, you need to render it. Click the Render button and see if it completes without error. You should see the rendered model in the display area, and the result of the operation in the console area below that.
Finally, export the model to an STL file for later printing.
Create a Model in Meshmixer
Meshmixer is a free and very powerful 3D modeling tool; we’ll only need a few of its features for this project.
Download the latest version of Meshmixer for your preferred computer operating system, and install it. These instructions were written using the Windows 64-bit version.
Set up Meshmixer
Start Meshmixer and select “File->Preferences” from the menu. Select the File tab from the Meshmixer pop-up window and make sure the “Flip Z-Y axis on Import-Export” is selected. This is because Meshmixer labels the vertical axis “Y”, while many other 3D modeling and printing tools use Z as the vertical axis. Click Done and you are done.

Import the Base
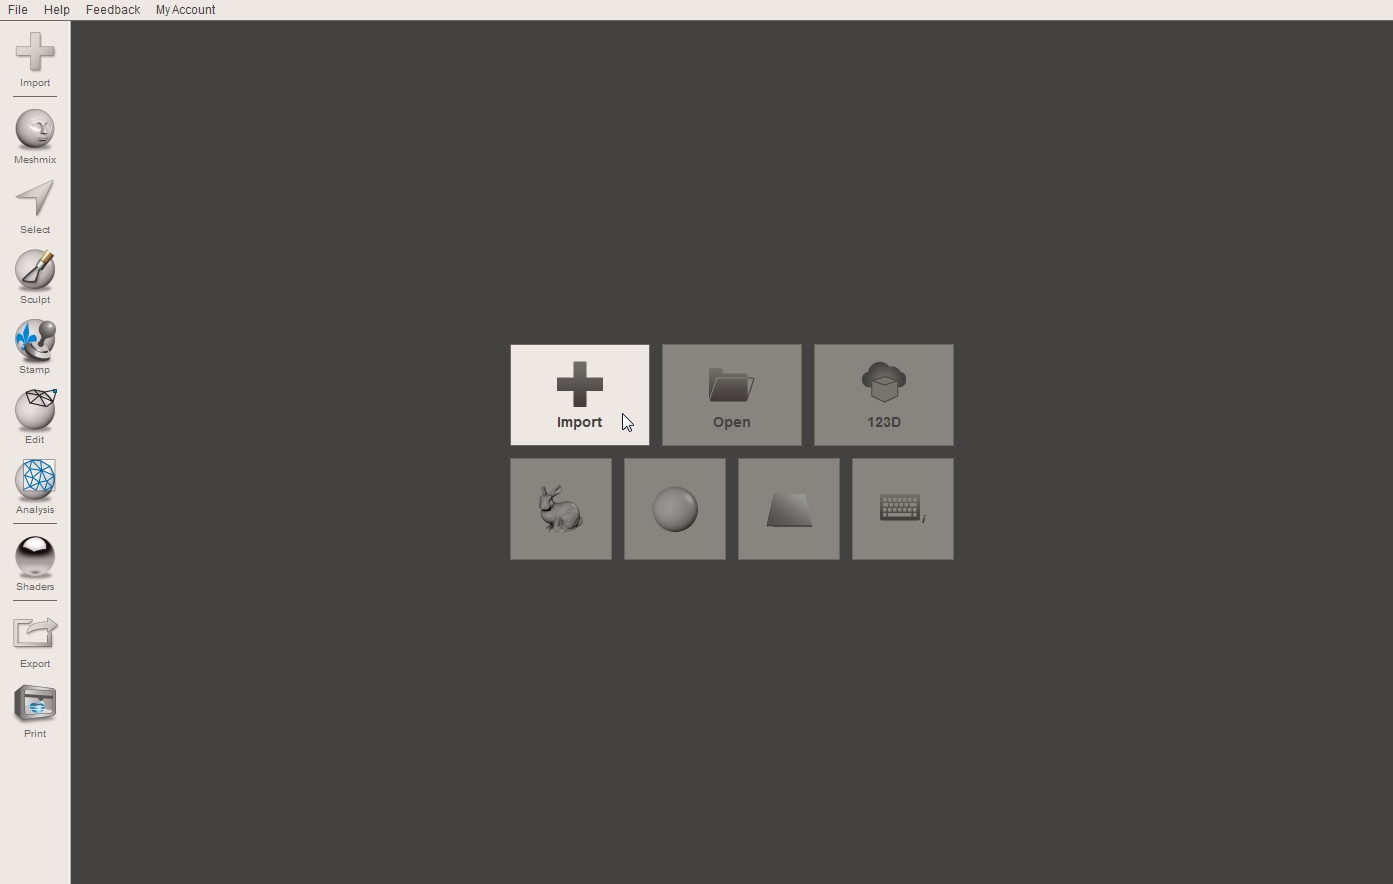
Now click the Import button on the left hand tool bar and select Import from the center of the main window.
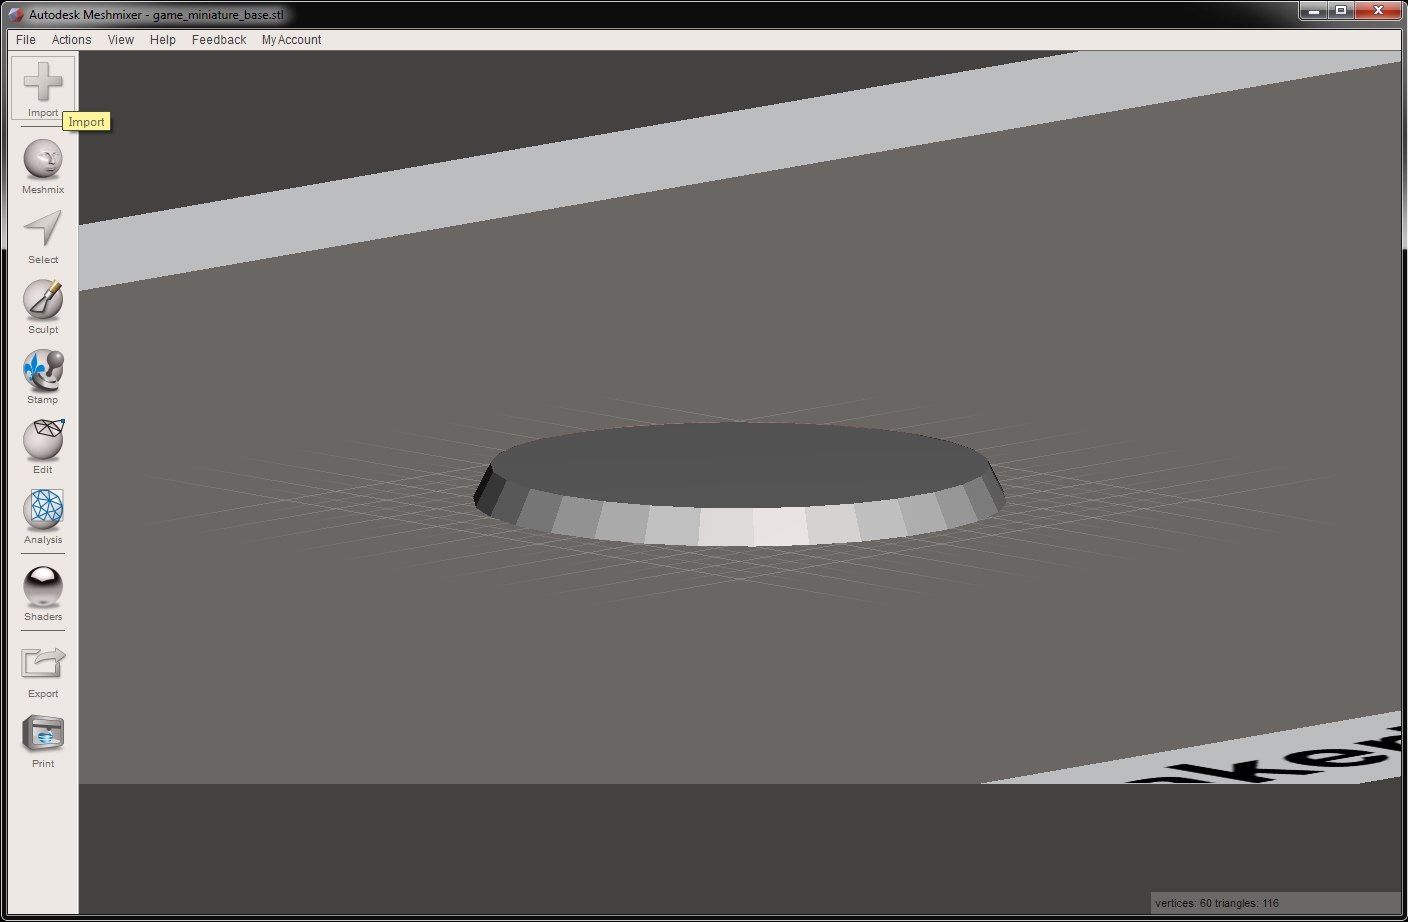
Next select the .stl file of the beveled base that you created in OpenSCAD earlier. The base should appear at the bottom of the platform in the main window. If the Objects Browser window is not visible, select “View->Show Objects Browser” from the menu and it will appear.
Import the Sontaran Clone Model
Click the Import button on the left tool bar again, and Meshmixer will ask if you want to Append or Replace the existing model. Ensure the “Flip Z-Y on Import/Export” checkbox is selected, and click “Append”.
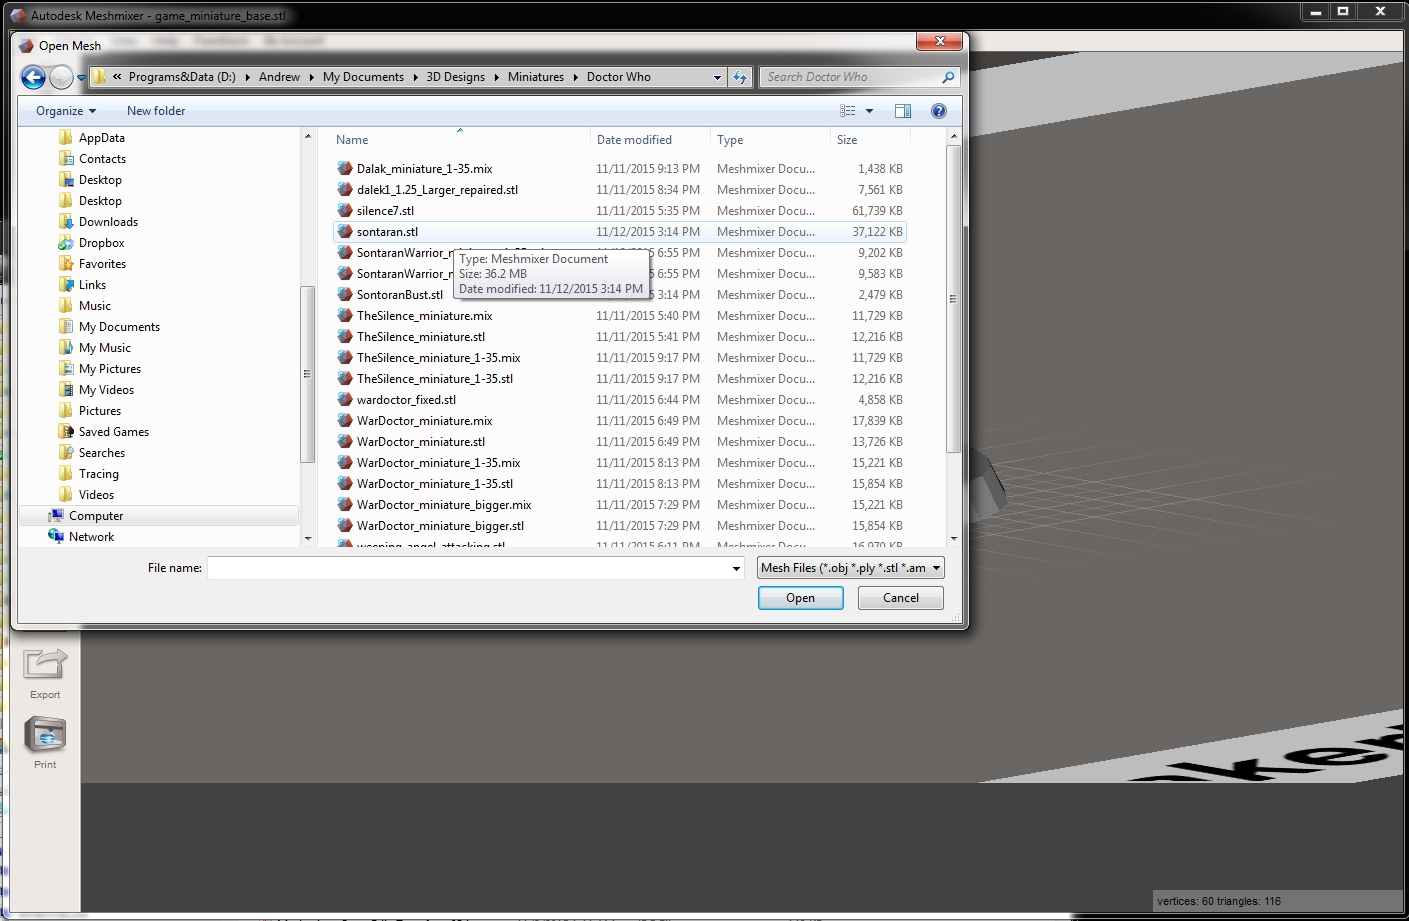
Select the desired .stl file to import. In this case, “sontaran.stl”.
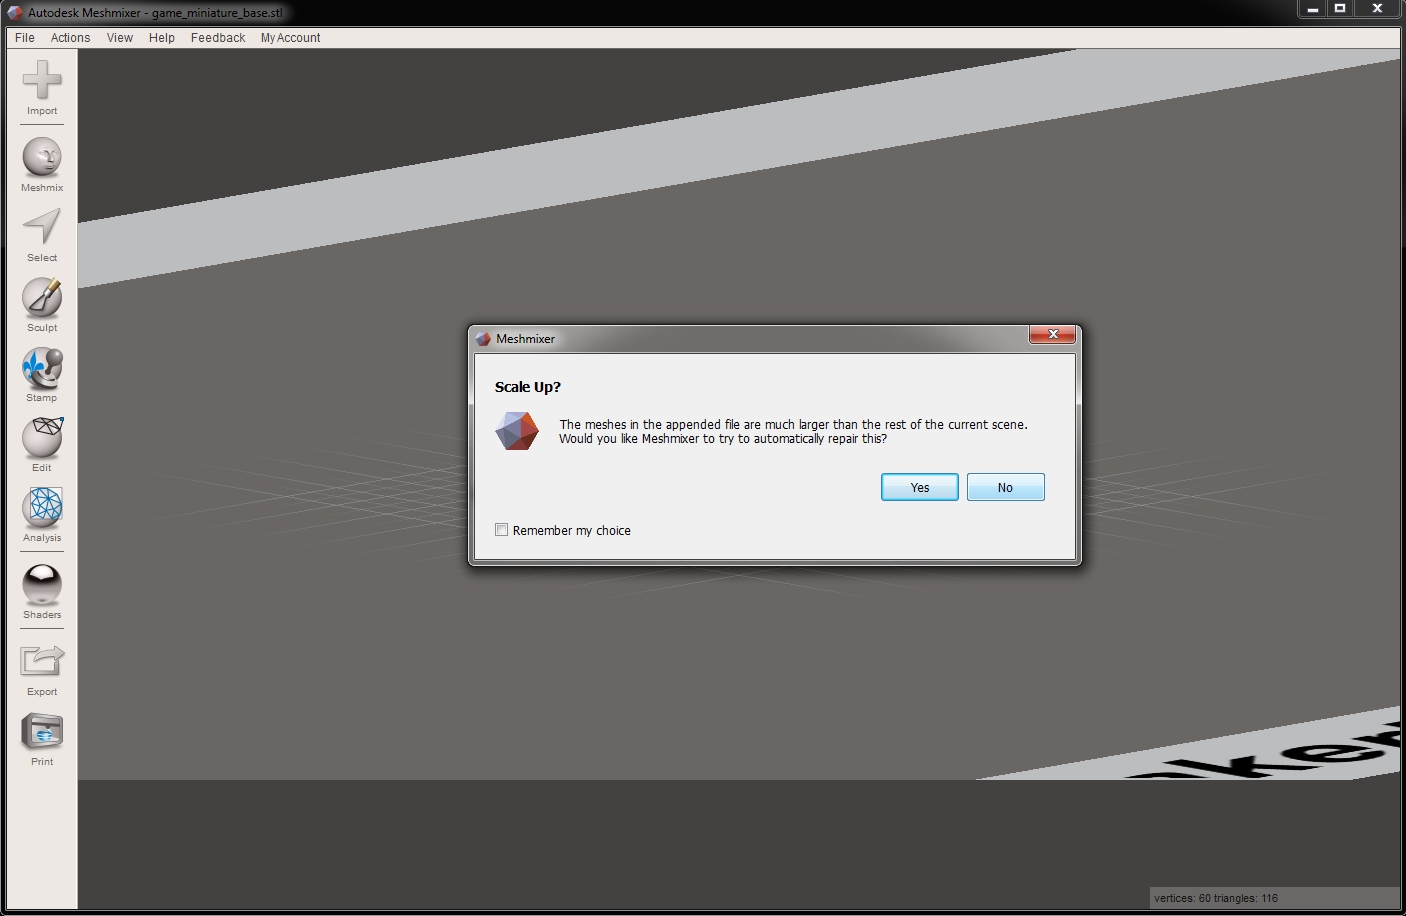
Meshmixer may ask if you want it to automatically “repair” the new model, because it is much bigger than the existing one. Decline this kind offer. We’ll scale the model ourselves, thank you very much.
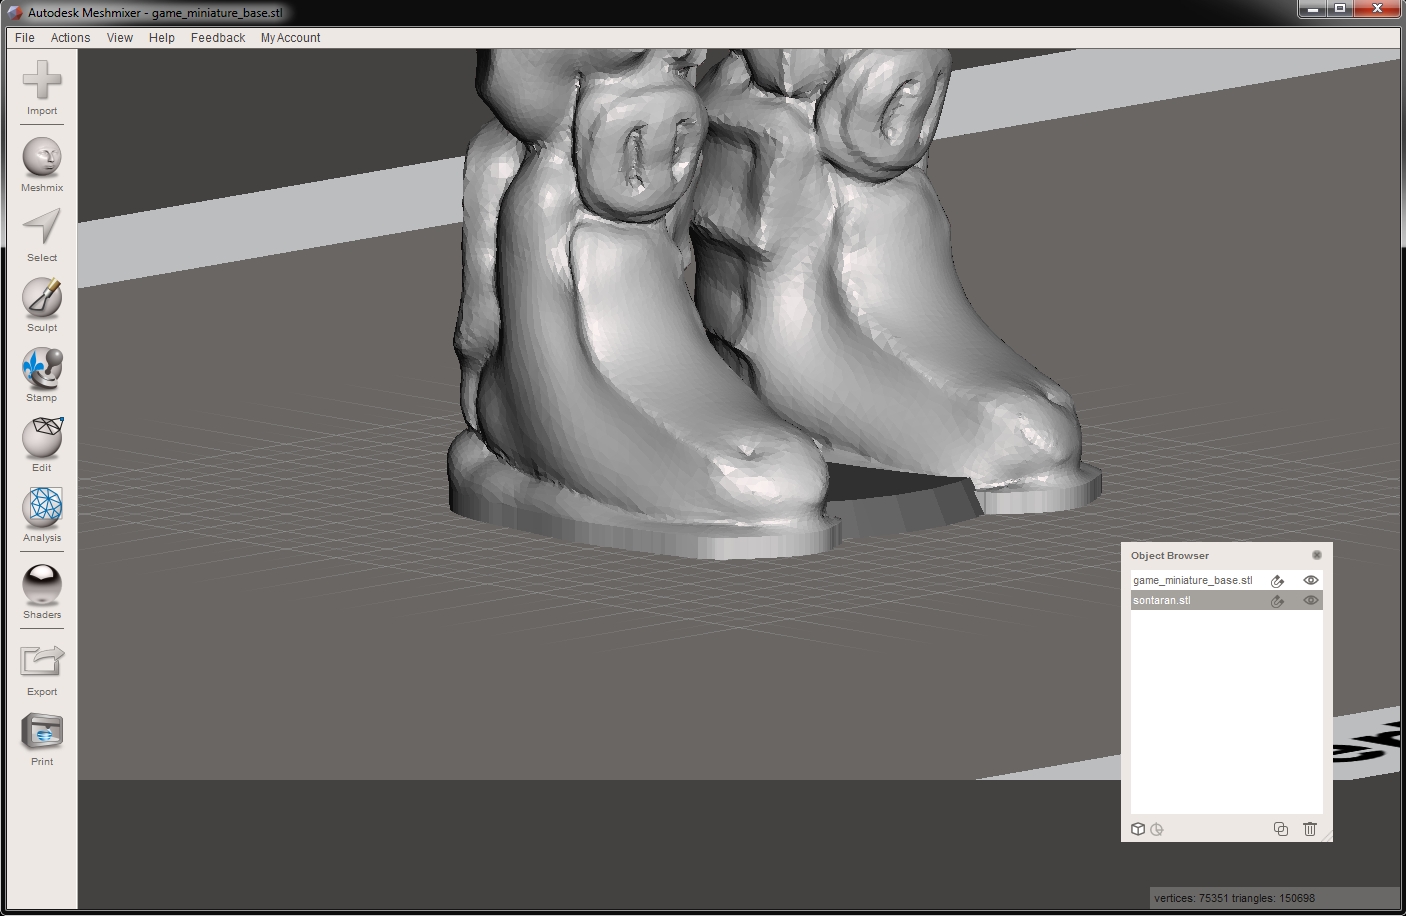
The model appears in the main window, and you can see the new model selected in the Objects Browser window.
Scale the Model Body
Click the Edit button from the left hand toolbar, and then select “Transform” from the tool window that appears.
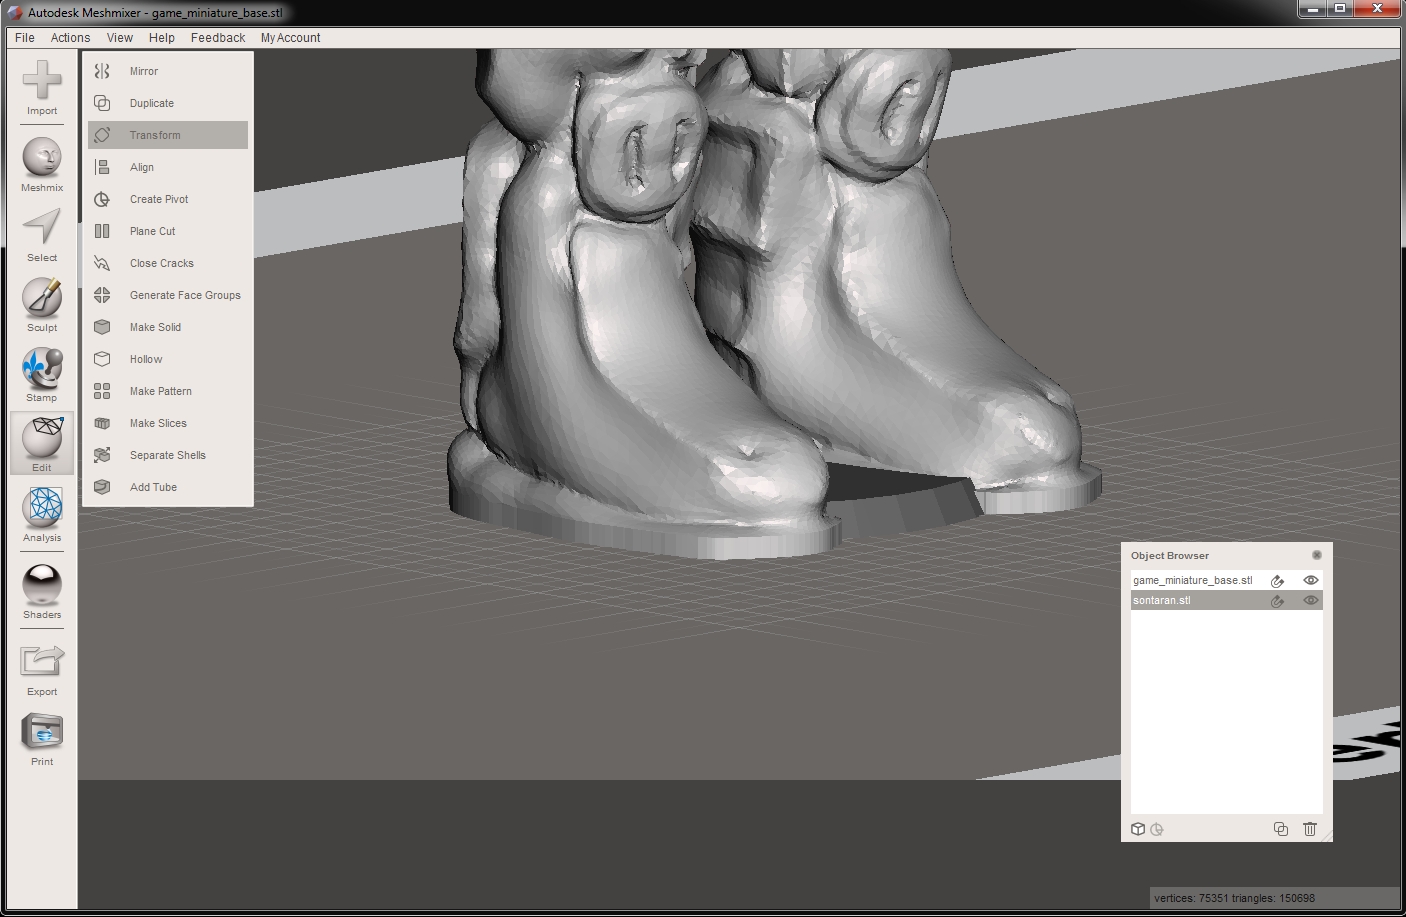
Be sure that the “Uniform Scaling” checkbox is selected, and change the Size Y value to 50 mm (remember that the vertical axis is labeled “Y” in Meshmixer). This is close enough to our final scale to work with. We can adjust the size of the figure after we replace the head if needed.
You also need to move the model downwards once you shrink it so it will be visible on your screen. Change the Translate Y value to -40 and you should see the Sontaran model again. You have to click in a different field to see changes previewed. Click Accept when you are happy with how it looks.

You may have to select “View->Recenter View” from the menu to get everything displayed in the main window.
Off with his Head!
Next we will remove the helmet. Make sure the sontaran.stl file is selected in the Objects Browser and click on the Edit button on the left hand toolbar. Then select “Plane Cut” from the Edit toolbar.
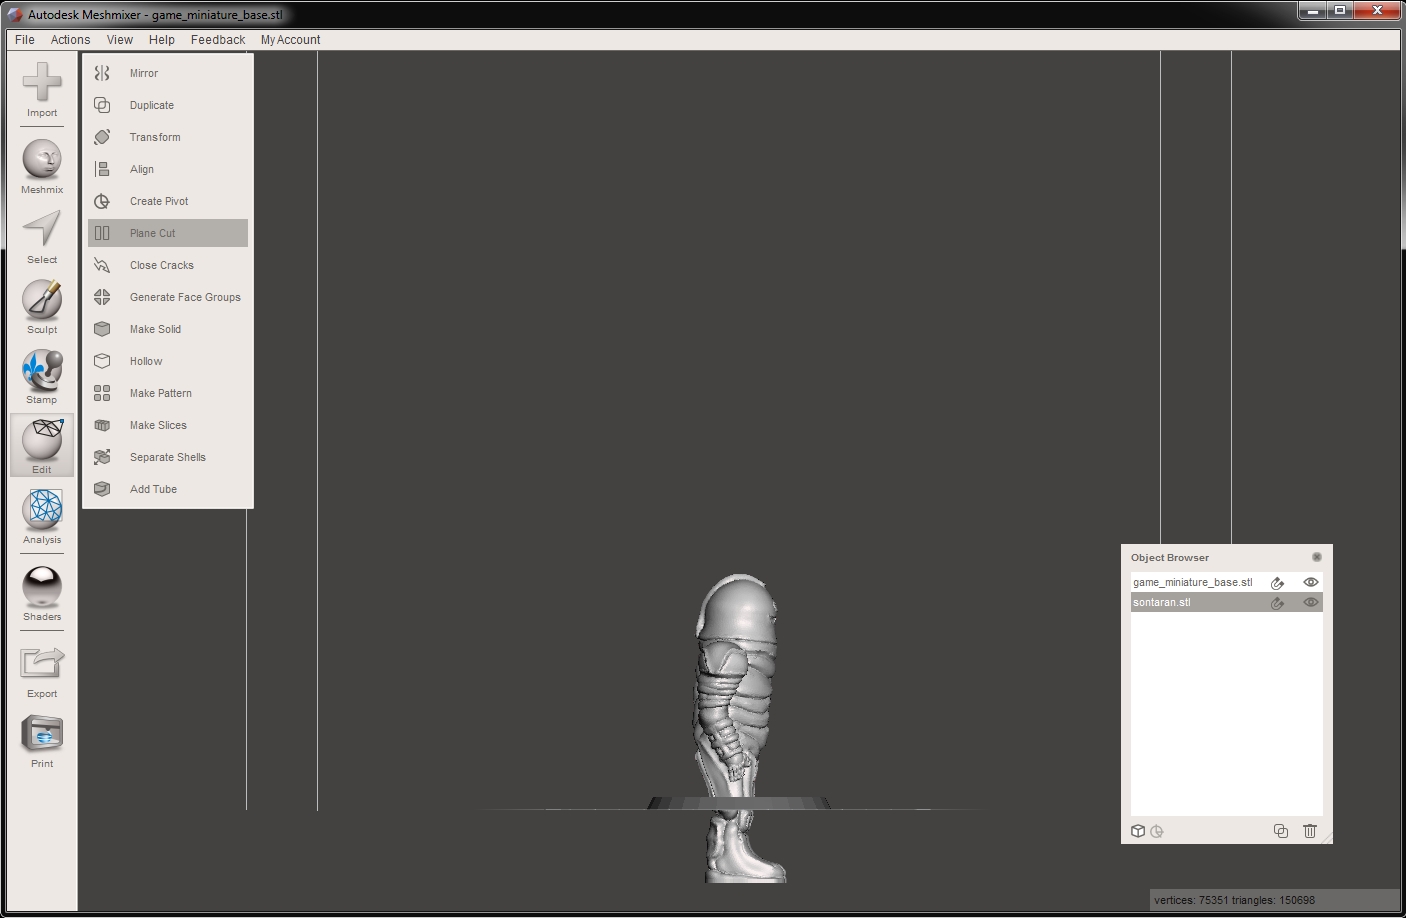
We are going to make two cuts, aligned with the ridges just below the helmet. It is helpful to have the view of the model from one side for this part; use the Alt key and your mouse to maneuver the view as desired.
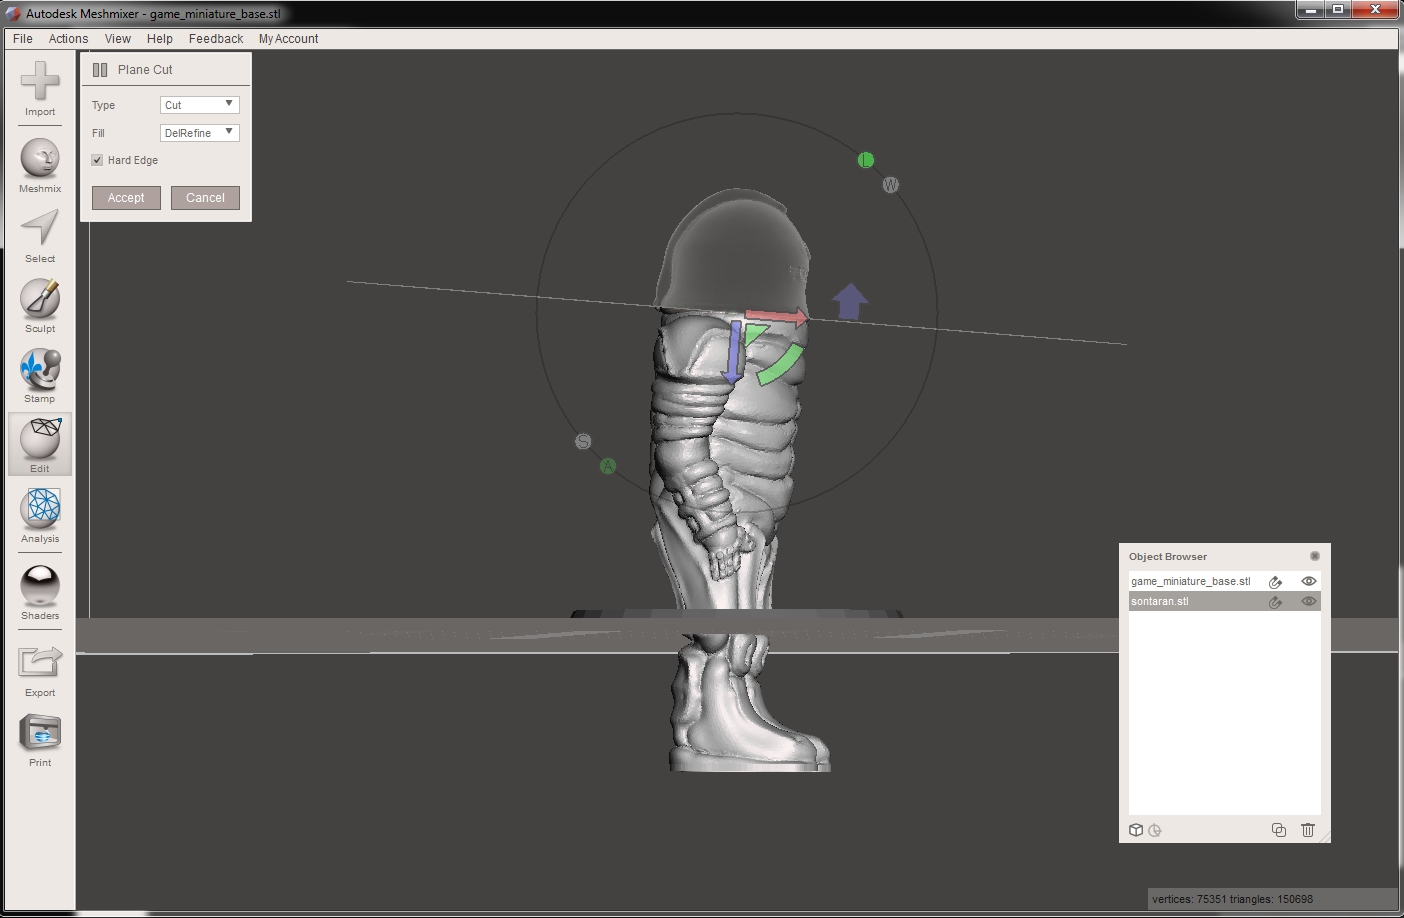
You can drag the Plane Cut tool up and down with the skinny purple arrow control. Change the angle with the green arc control. The wide purple arrow shows the side of the plane that will be removed. Use the tool controls to rotate and align the tool so that arrow is pointing up and the plane aligns with the ridge at the front of the helmet for the first cut.
Make sure the “Hard Edge” checkbox is selected, and click Accept when you are happy with the positioning of the Plane Cut tool.
Repeat the process to make another cut aligning with the ridge at the back of the helmet.
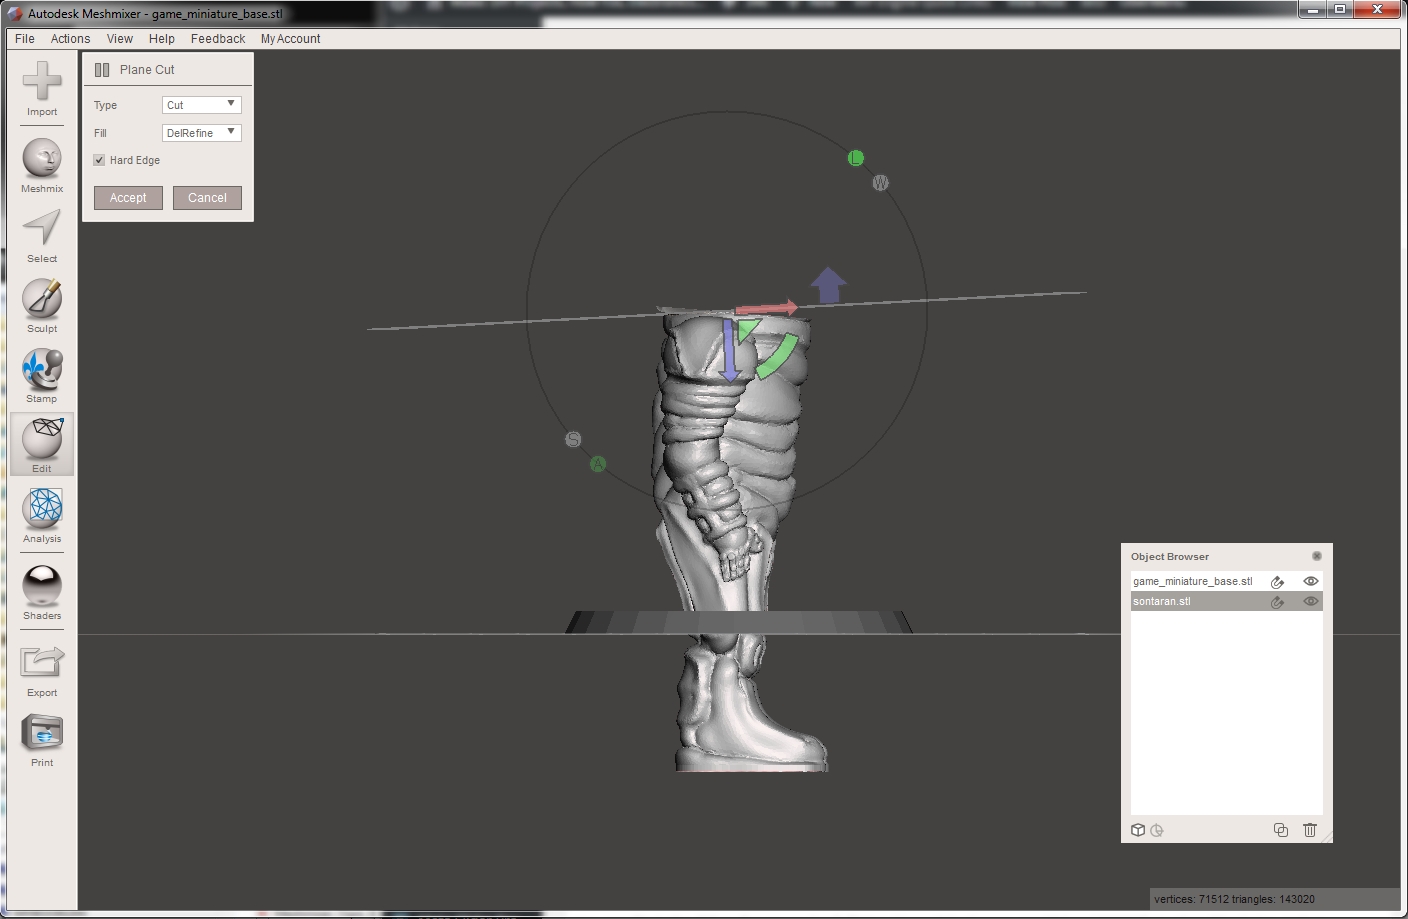
After two cuts you can see the helmet has been sheered away along two planes.

Add the Head
Now we’ll import the model of the Sontaran Bust, scale it to fit and add it to the model.
Use the Import button on the left hand tool bar. As you did earlier, make sure the “Flip Z-Y on Import/Export” checkbox is selected, and click Append. Then select the SontaranBust.stl file. As before, decline Meshmixer’s offer to scale the file for you.
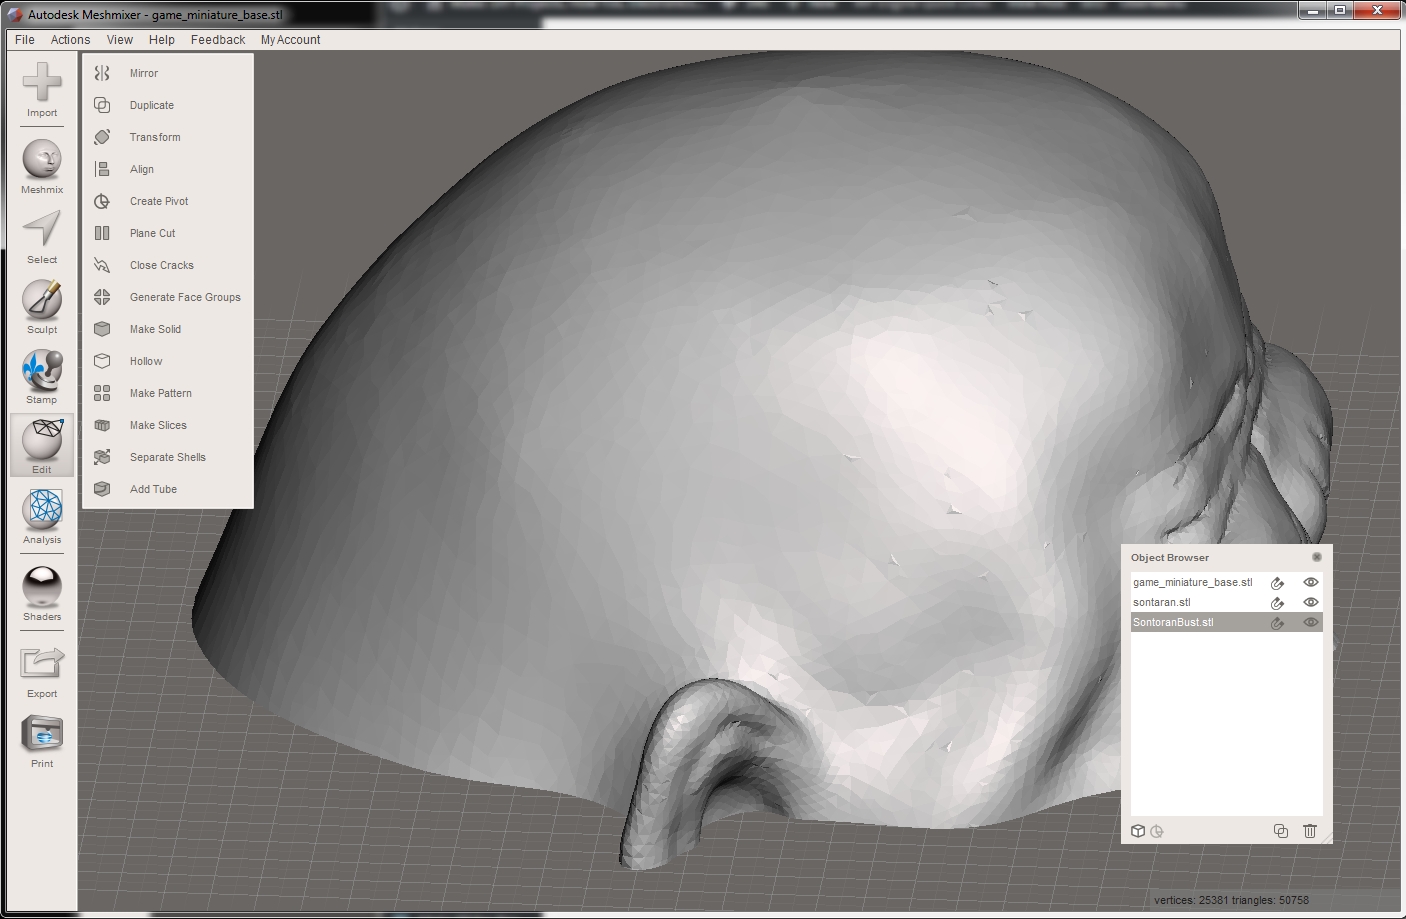
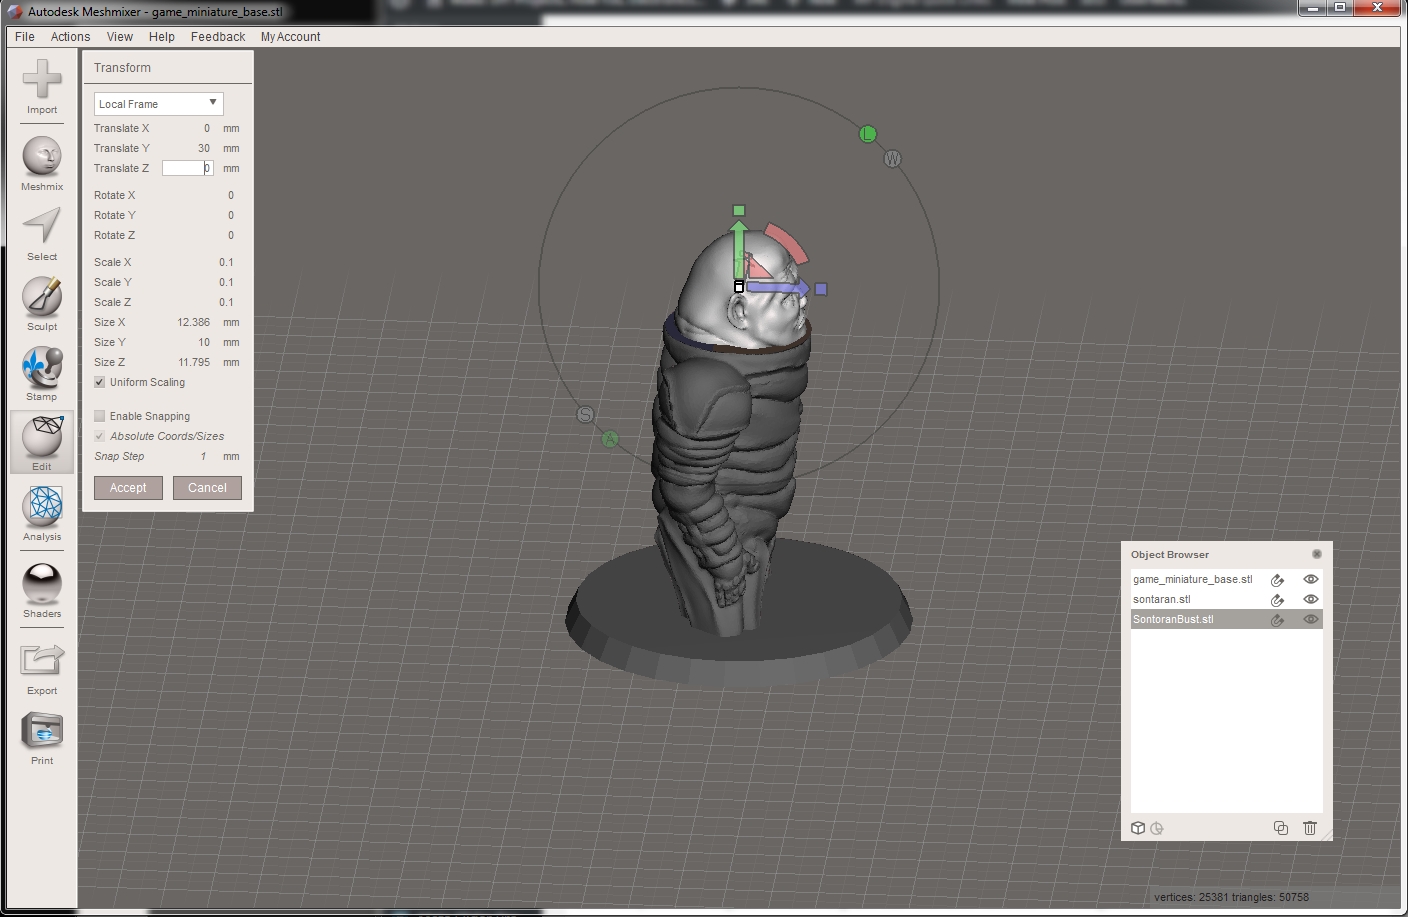
The resulting part is far too large, of course. Make sure the SontaranBust.stl model is selected in the Objects Browser, and click the Edit button from the left hand toolbar. Then select Transform from the Edit toolbar.
Make sure the ‘Uniform Scaling’ checkbox is selected, and adjust the size of the head until it looks right for the Sontaran’s body. Use the “Translate Y” field or the thin green arrow control on the Transform tool to place the head atop the body. Make sure the model of the head is slightly embedded into the model of the body, so there are no gaps. Click Accept when you are happy with the results.
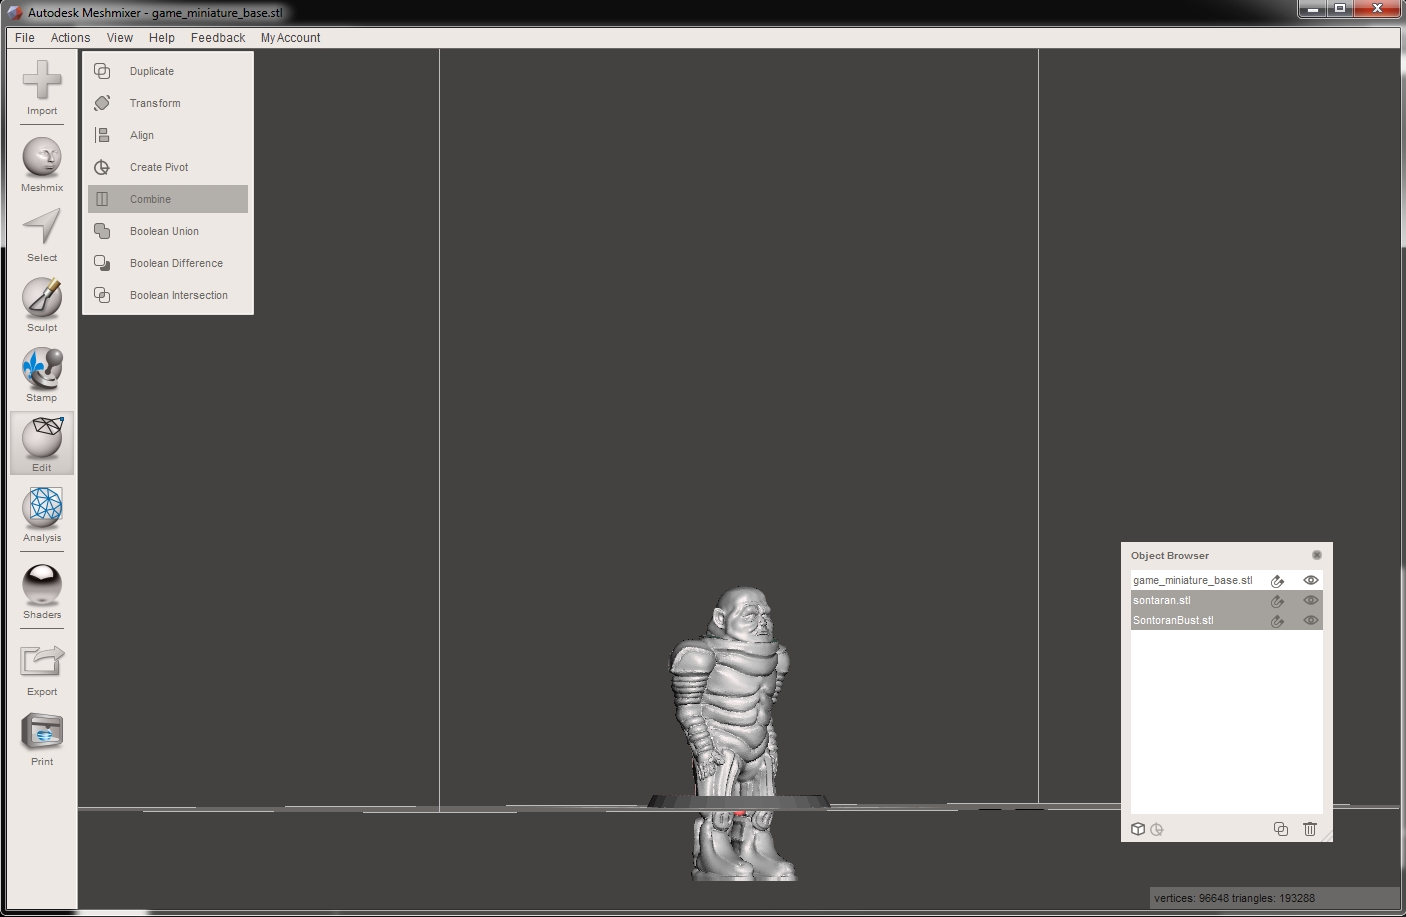
Combine Head and Body
To move the head and body together, you must combine them into one model. Make sure the SontaranBust.stl model is still selected in the Objects Browser. Hold down the Ctrl key and click the sontaran.stl model, and now both models should be selected in the Objects Browser. Click the Combine tool to add the models together.
The resulting combined size of the head and body is close enough to the desired 48mm for our purposes. However, if you need to scale the combined model now, you can do so by clicking the Edit button on the left hand toolbar and selecting the Transform tool.
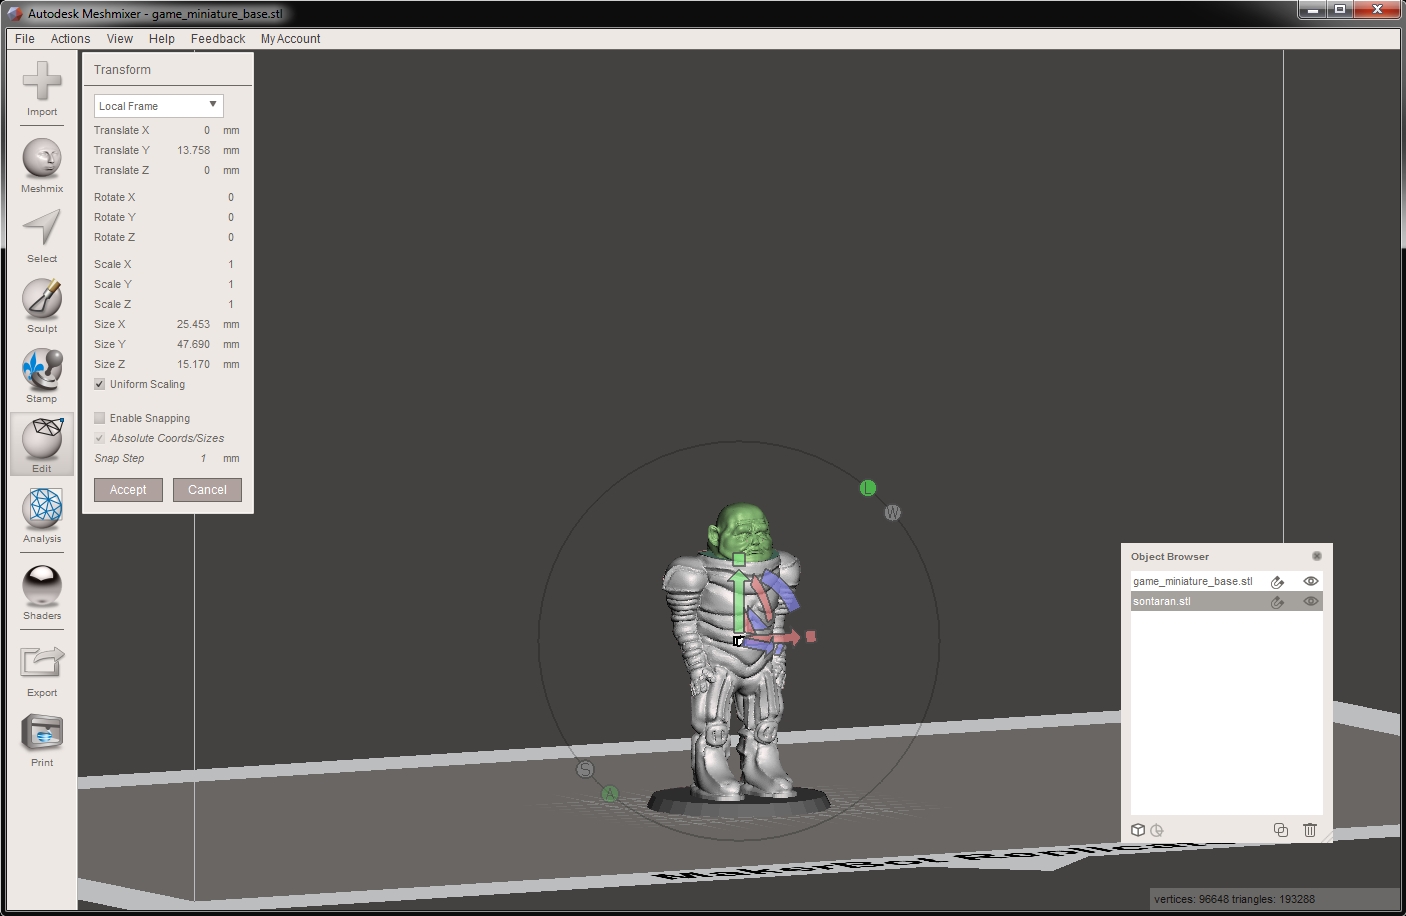
Place Body on the Base
Use the Transform tool from the Edit toolbar to translate the combined sontaran.stl model upwards until the feet are just barely embedded in the 2 mm beveled base.
Now select both the sontaran.stl model and the model for the base in the Objects Browser (Hold down the Ctrl key, remember?), and use the Combine tool to make them one model.
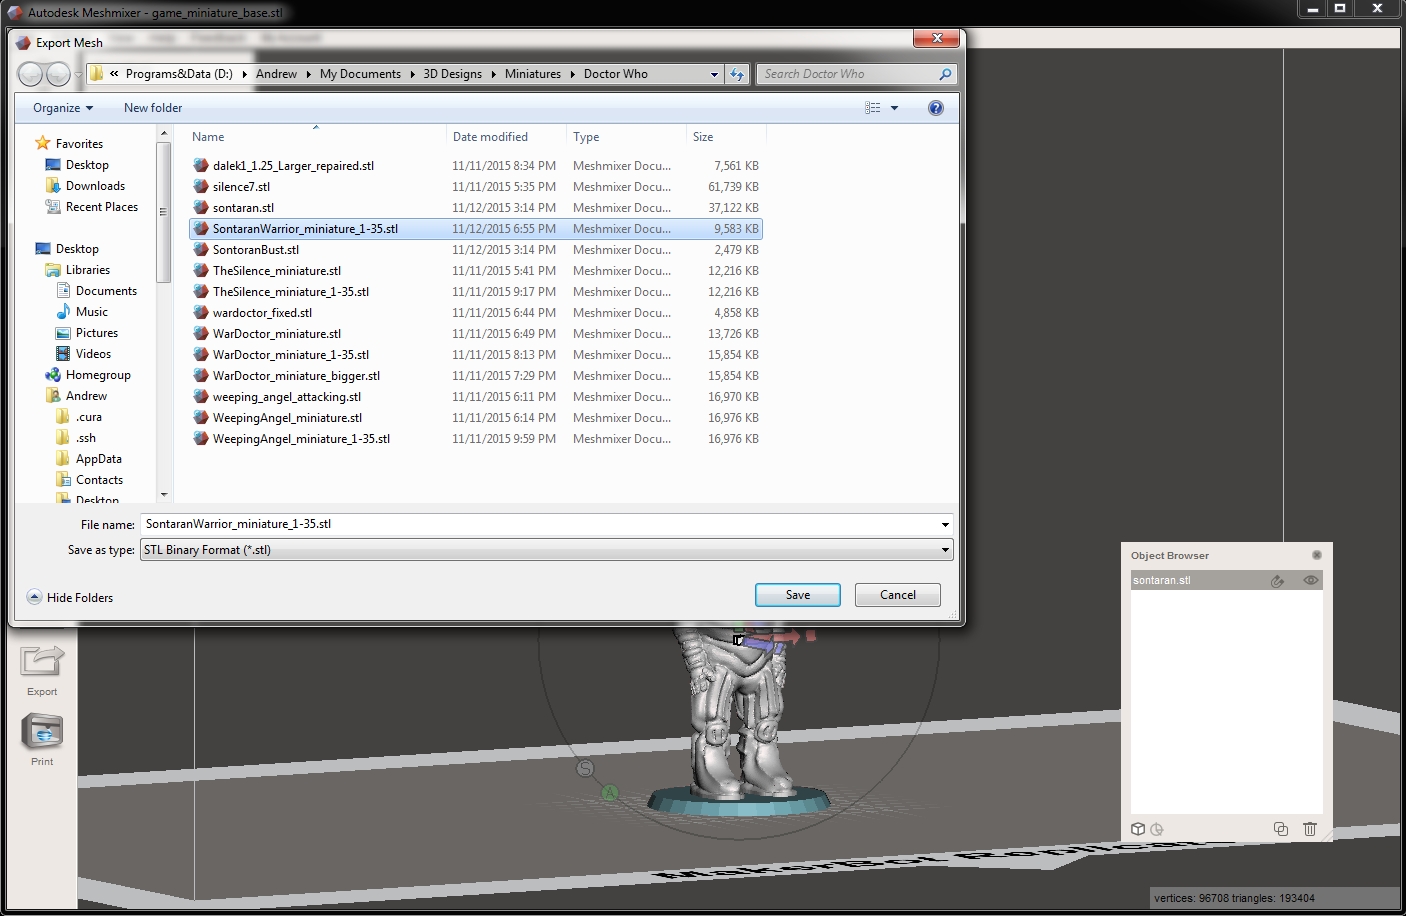
Export the STL File
We’re almost done! Now click the Export button on the left hand toolbar to export the model as an STL file for printing.
Print your Miniature
I used Cura version 15.04 on a Printrbot Simple Metal, and I was very happy with my results. I printed at 0.2 mm layer height with 15% infill and no support.
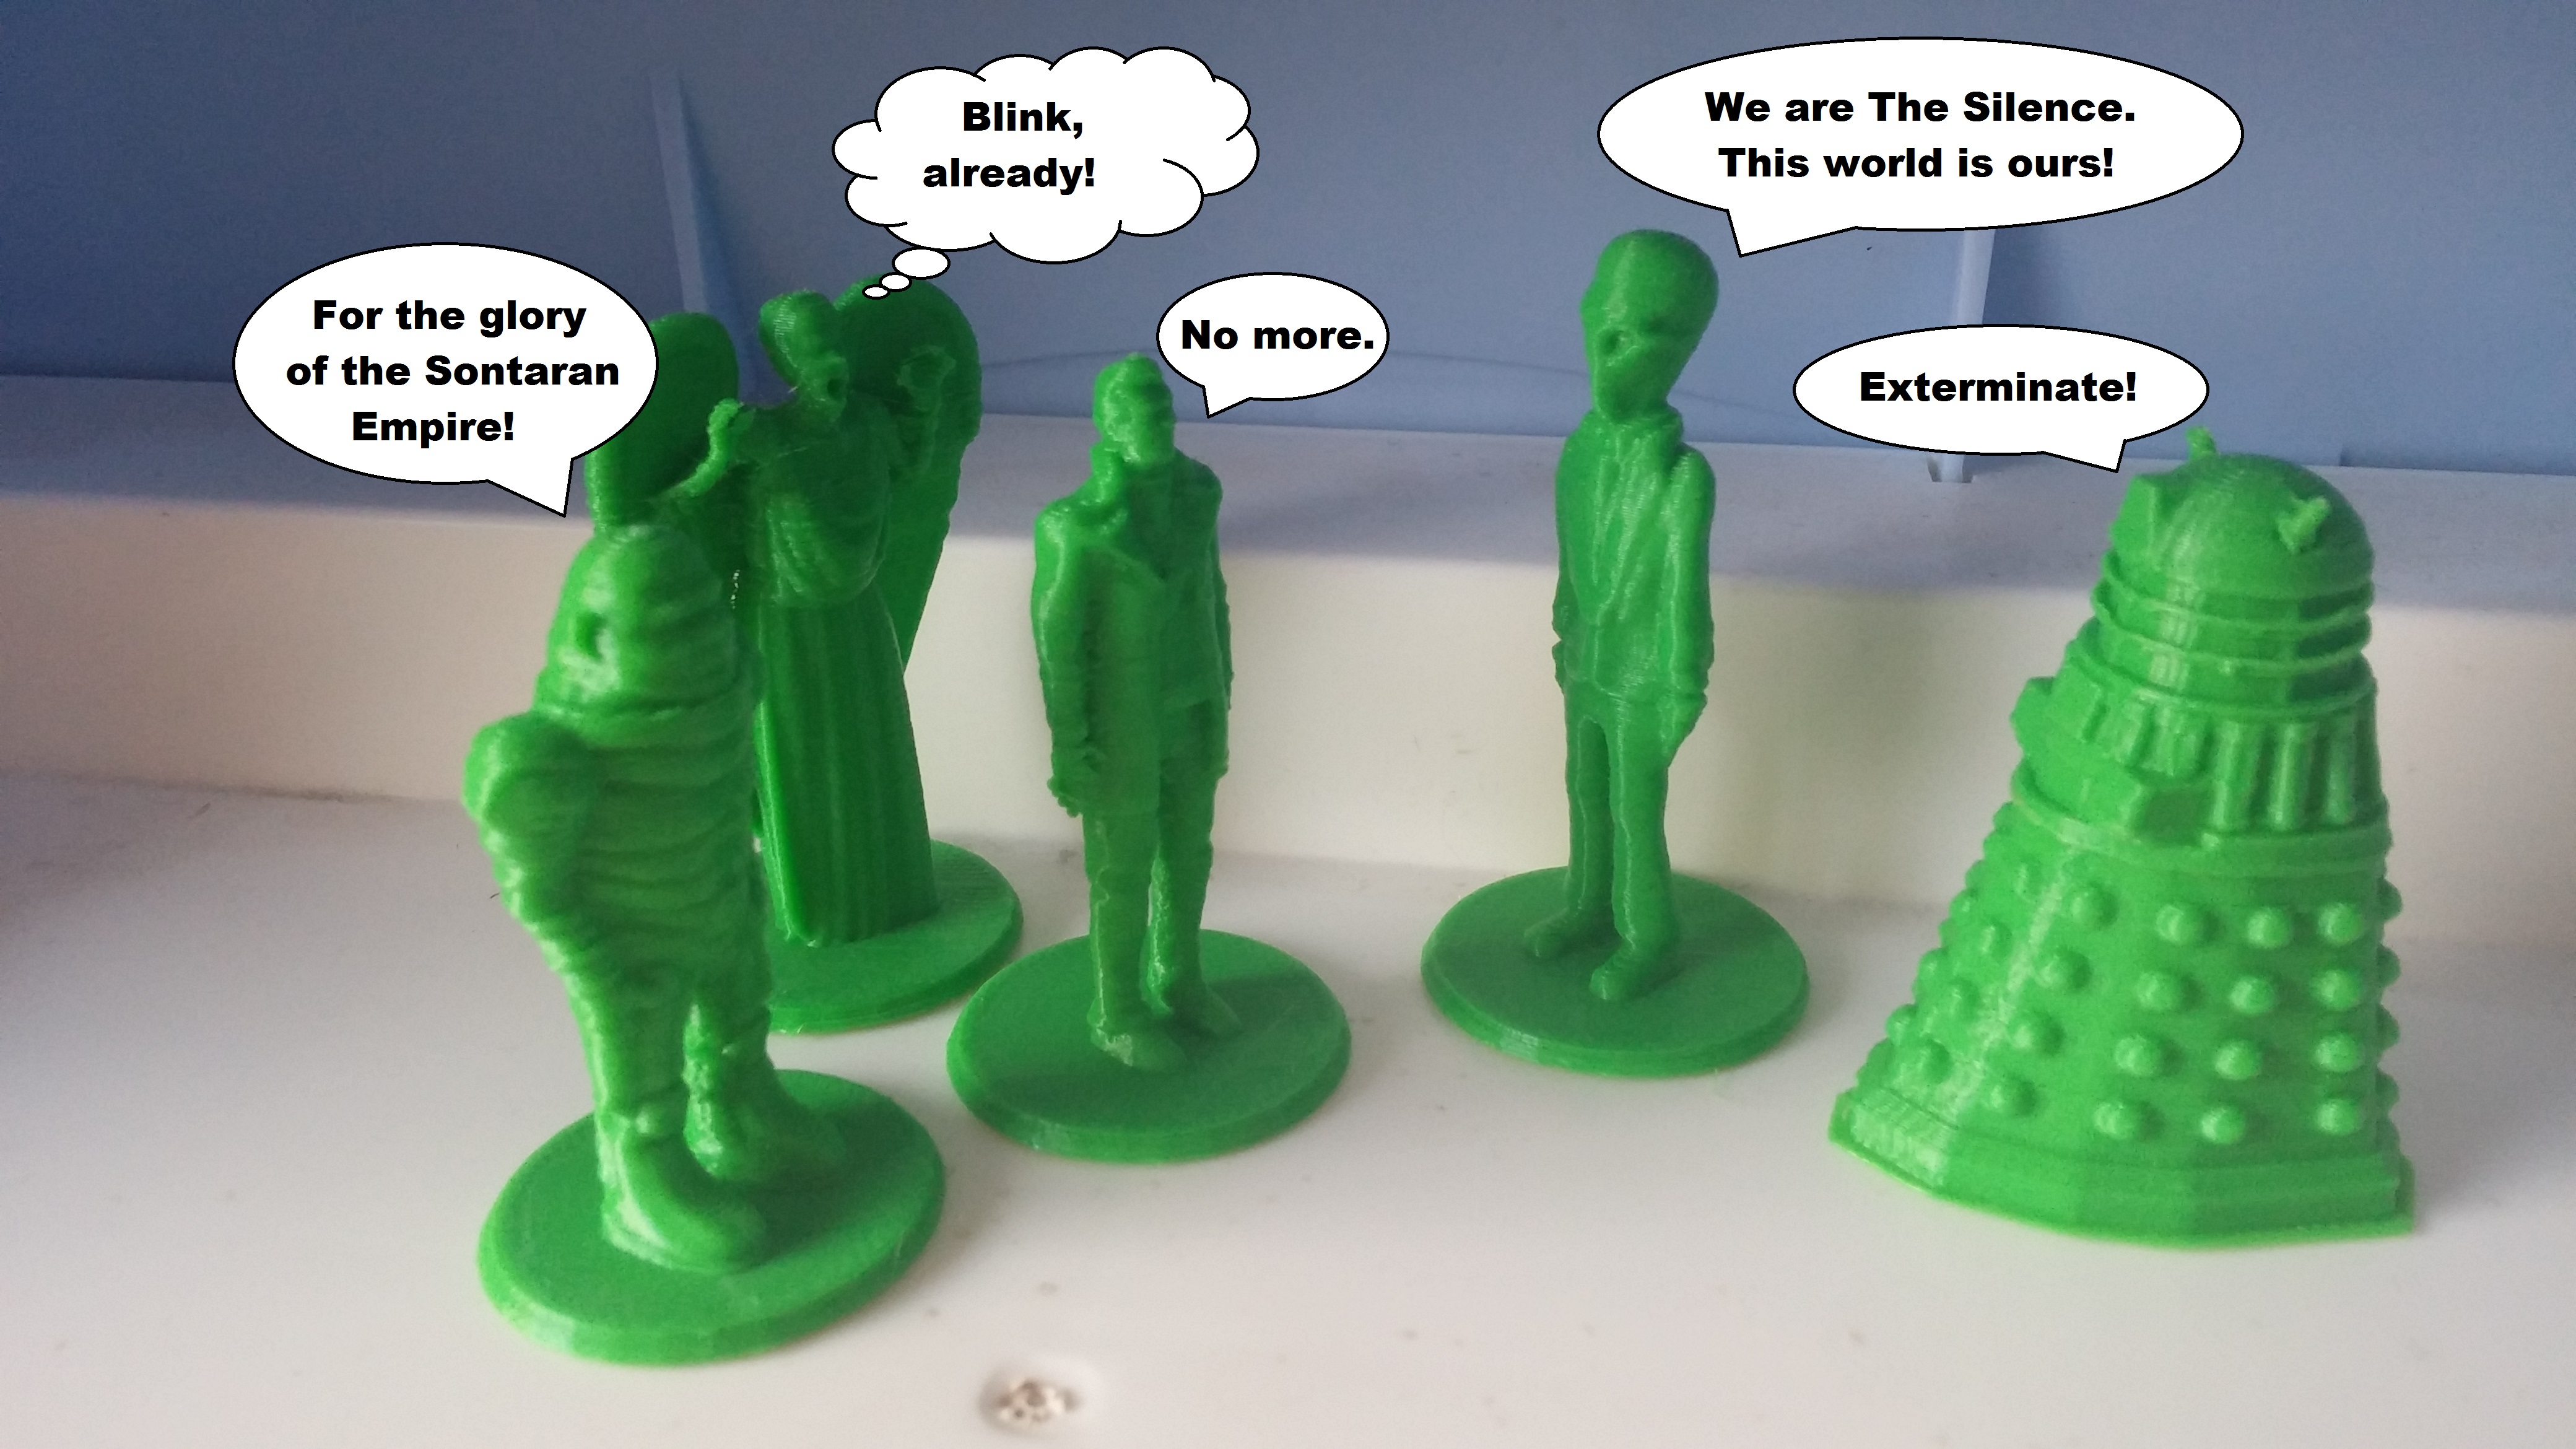
You can find the files for my Doctor Who Sontaran Warrior model on Thingiverse. I’ve got quite a few miniatures I made this way posted there as well. Other Doctor Who themed minis include the War Doctor, a Weeping Angel (original model by fantasygraph), and The Silence.
Don’t just stop with my examples, try something on your own! Pick your favorite characters from a game, movie, or book and miniaturize them! This is a great way to learn some basics ways to manipulate existing STL files in Meshmixer. Have fun with it! Share your own creations in the comments below.
ADVERTISEMENT
Join Make: Community Today


